How to Register and Verify Account on FameEX

How to Register on FameEX
How to Register an Account on FameEX with Email or Phone Number
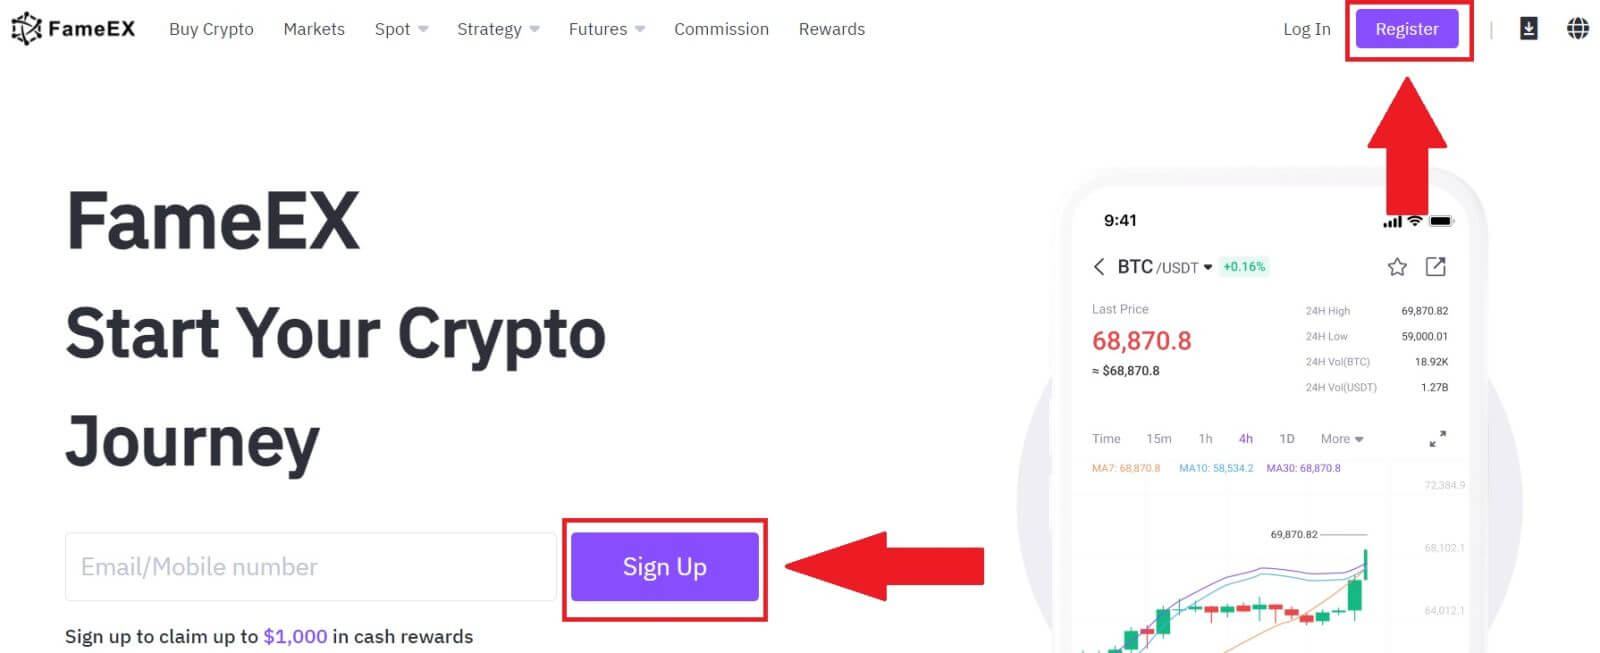
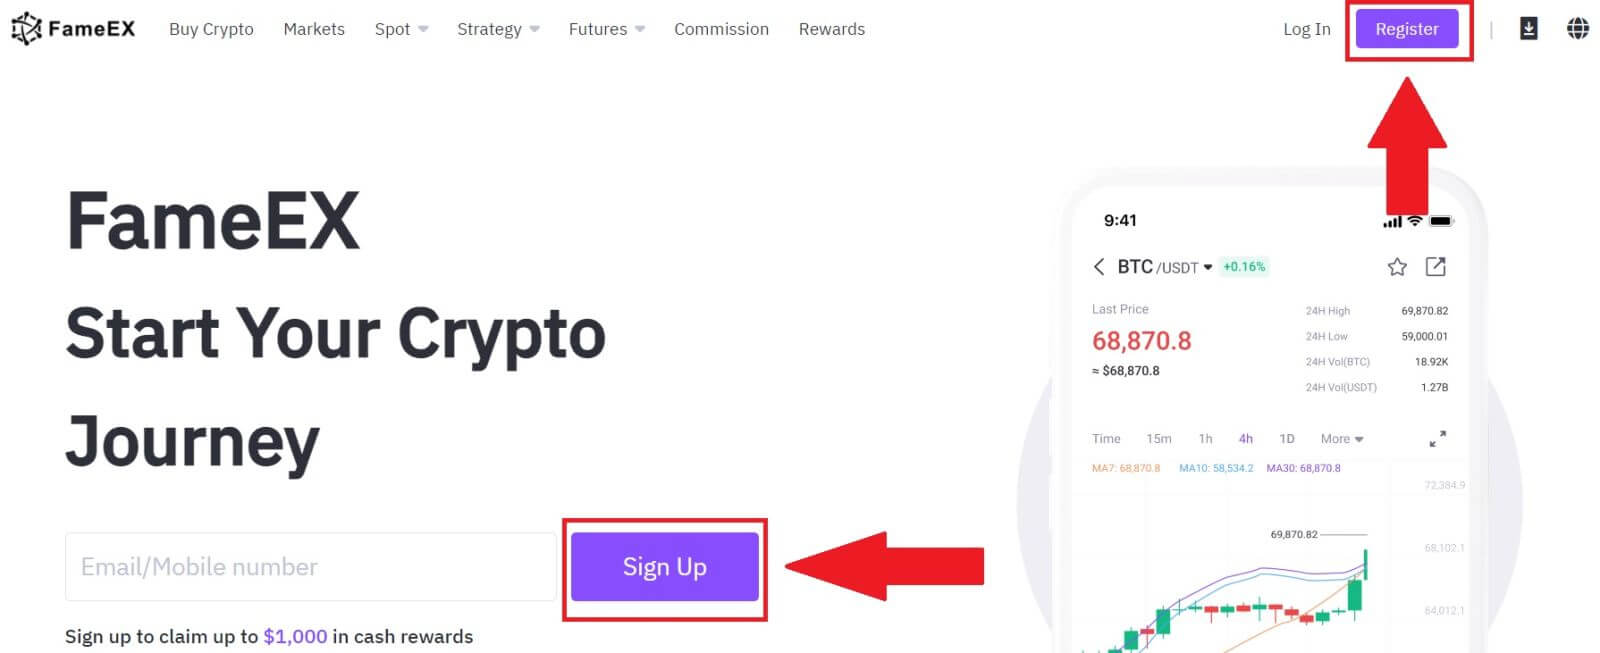
1. Go to the FameEX website and click on [Sign Up] or [Register].
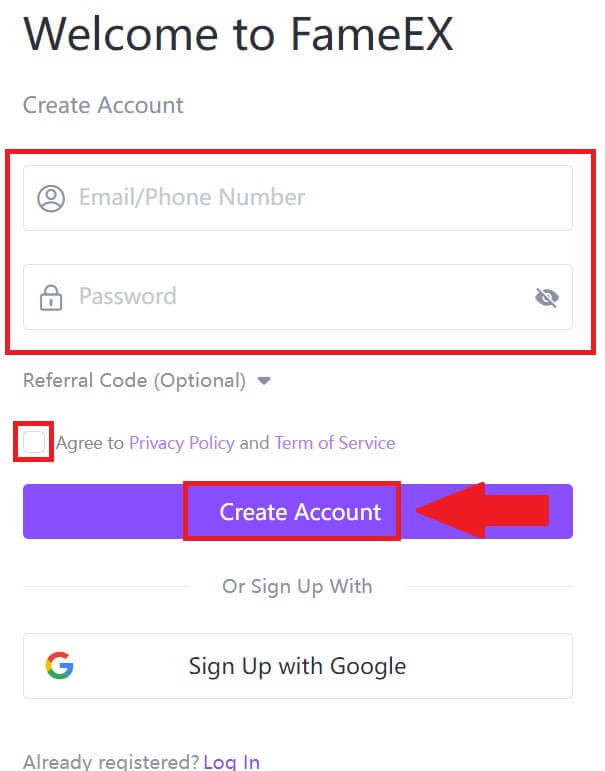
2. Enter your [Email] or [Phone Number] and create your secure password. Tick the box, and then click on [Create Account].
Note:
- The 8-20 character password.
- Include at least 3 of the following: upper case, lower case, digit and symbol.
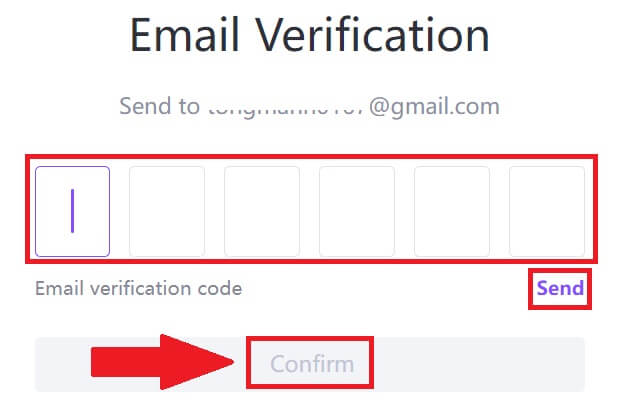
3. Click [Send] to receive a 6-digit verification code in your email or phone number. Enter the code and click [Confirm].
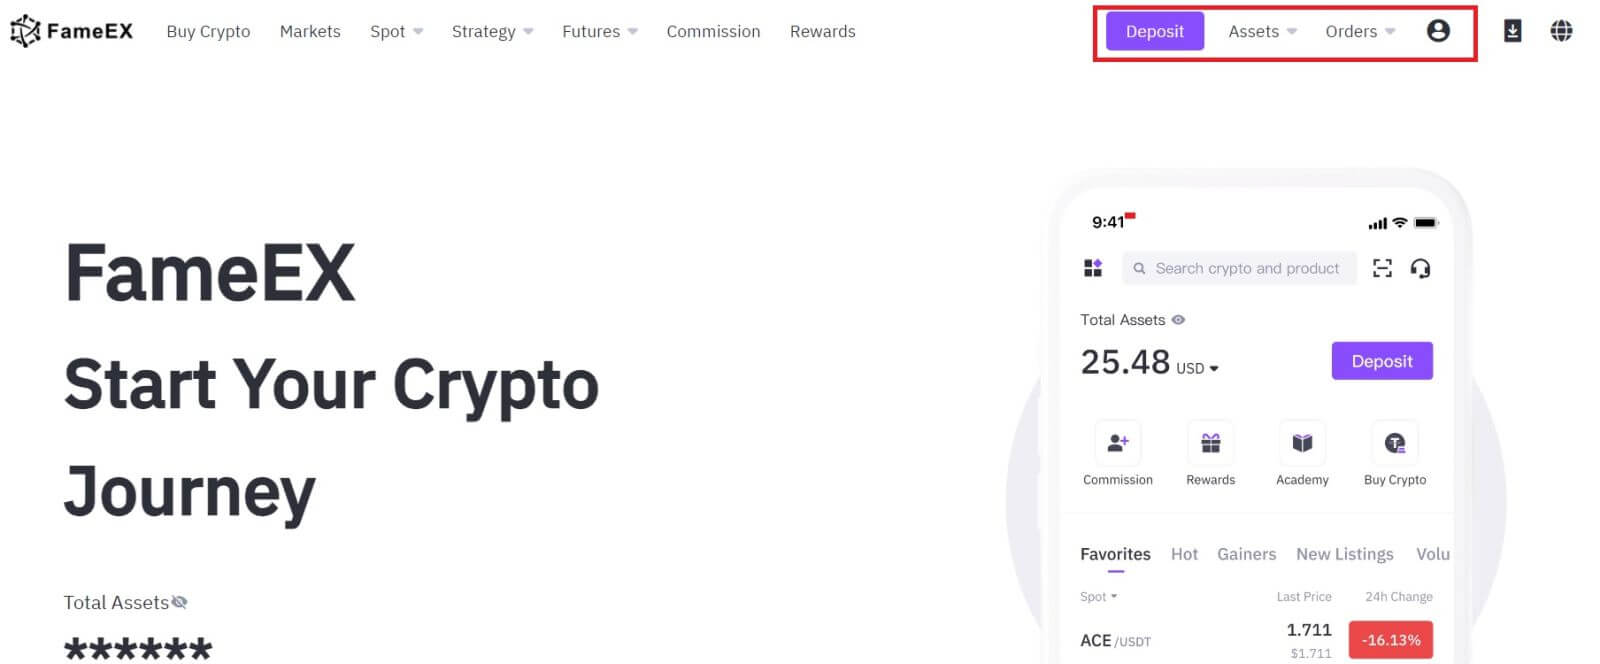
4. Congratulations, you have successfully registered an account on FameEX.
How to Register an Account on FameEX with Google
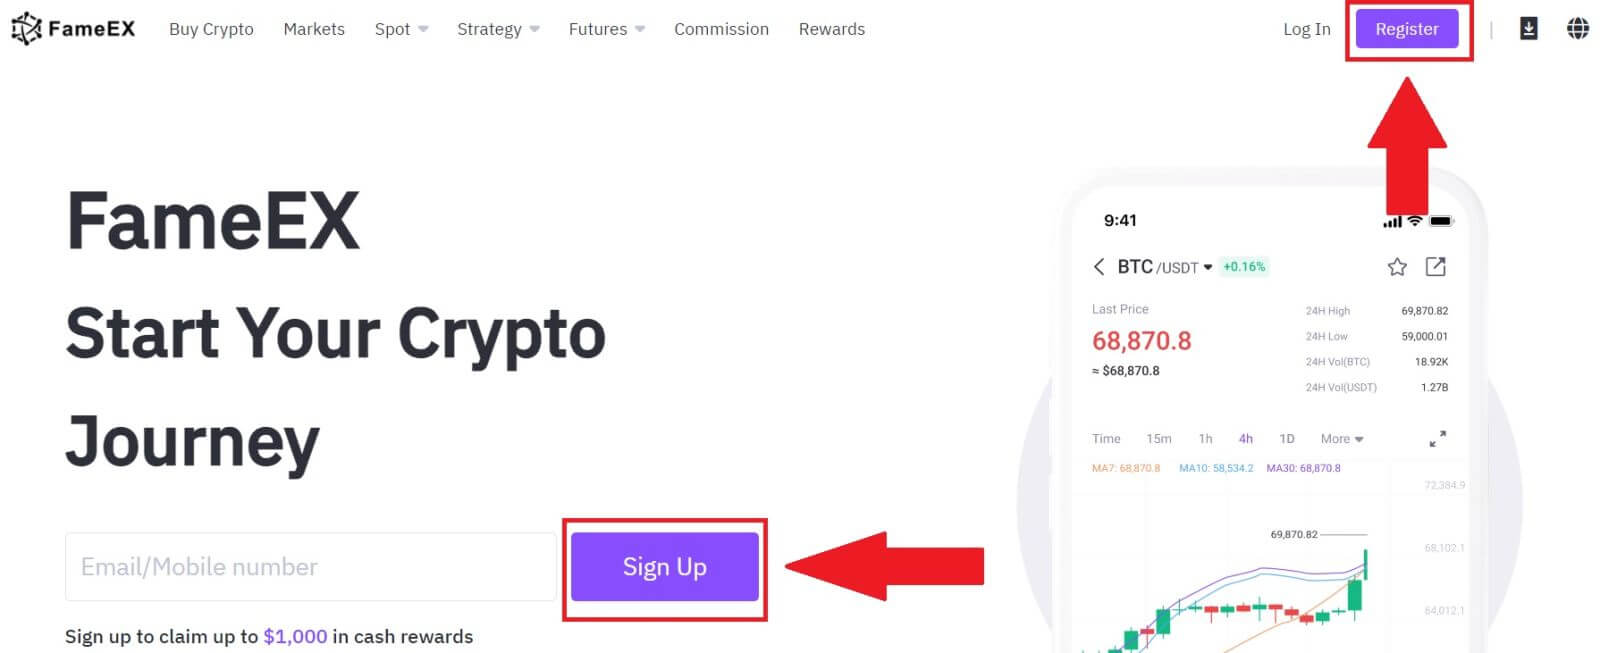
1. Go to the FameEX website and click on [Sign Up] or [Register].
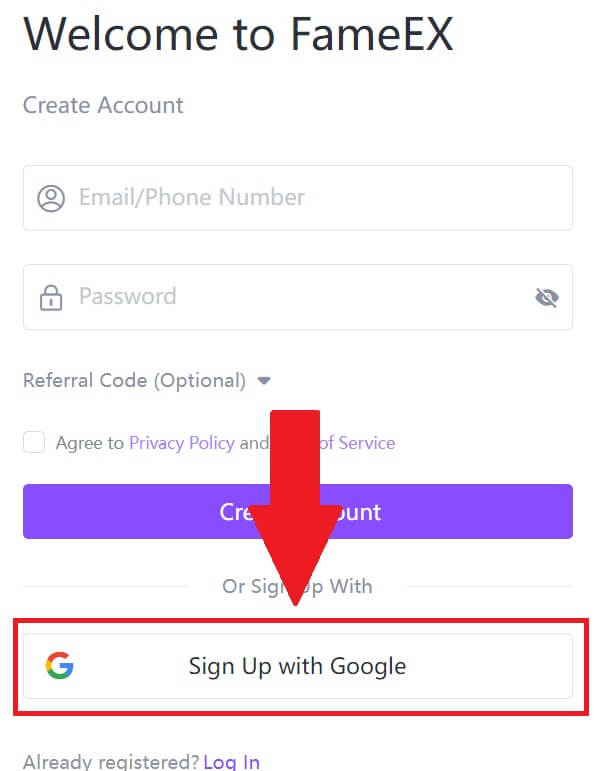
2. Click on the [Google] button.
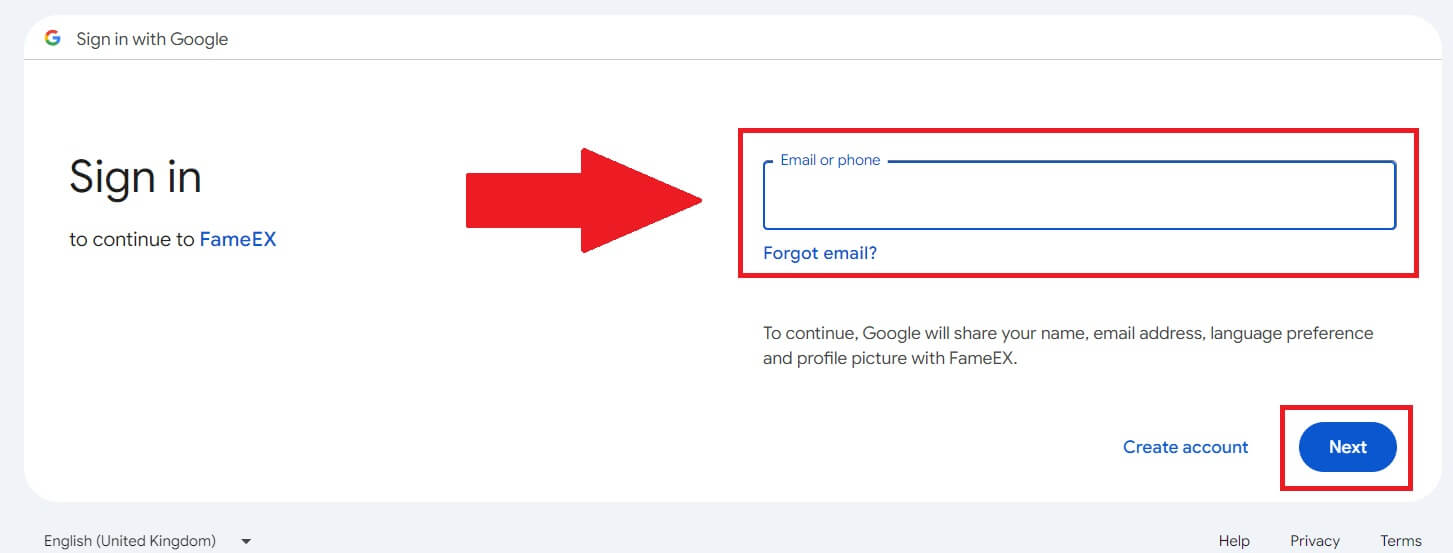
 3. A sign-in window will be opened, where you will need to enter your email address and click on [Next].
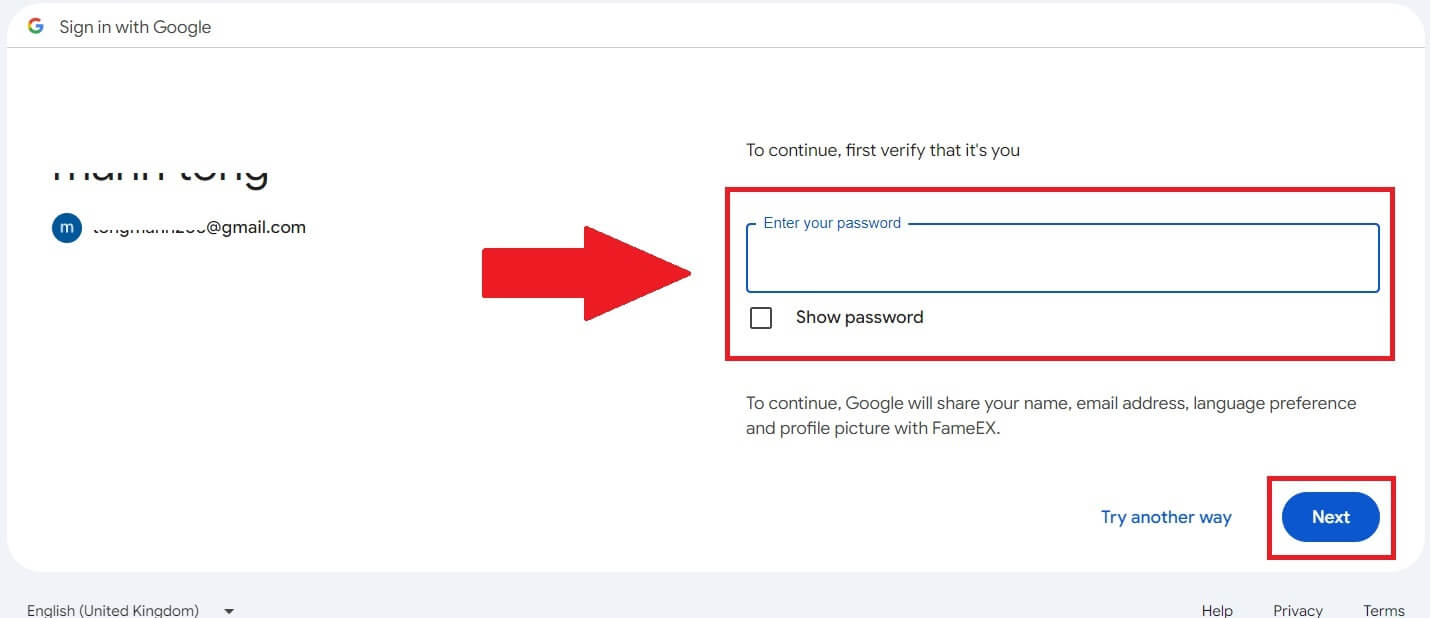
 4. Then enter the password for your Google account and click [Next].
5. Click on [Continue] to confirm signing in with your Google account.
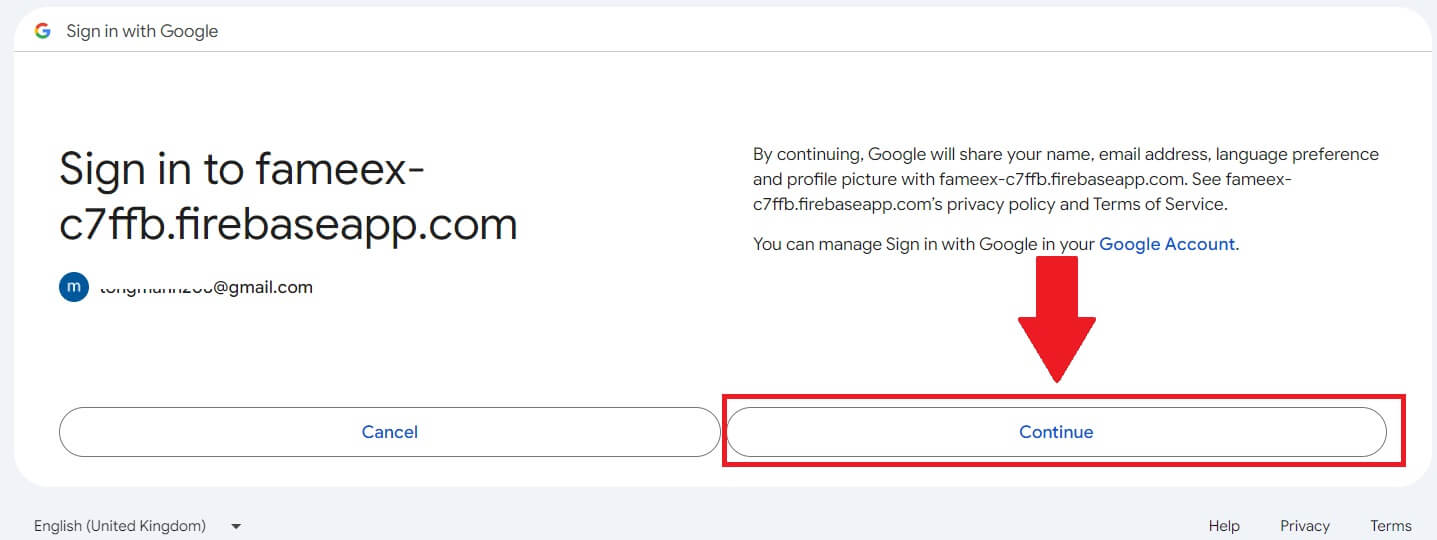
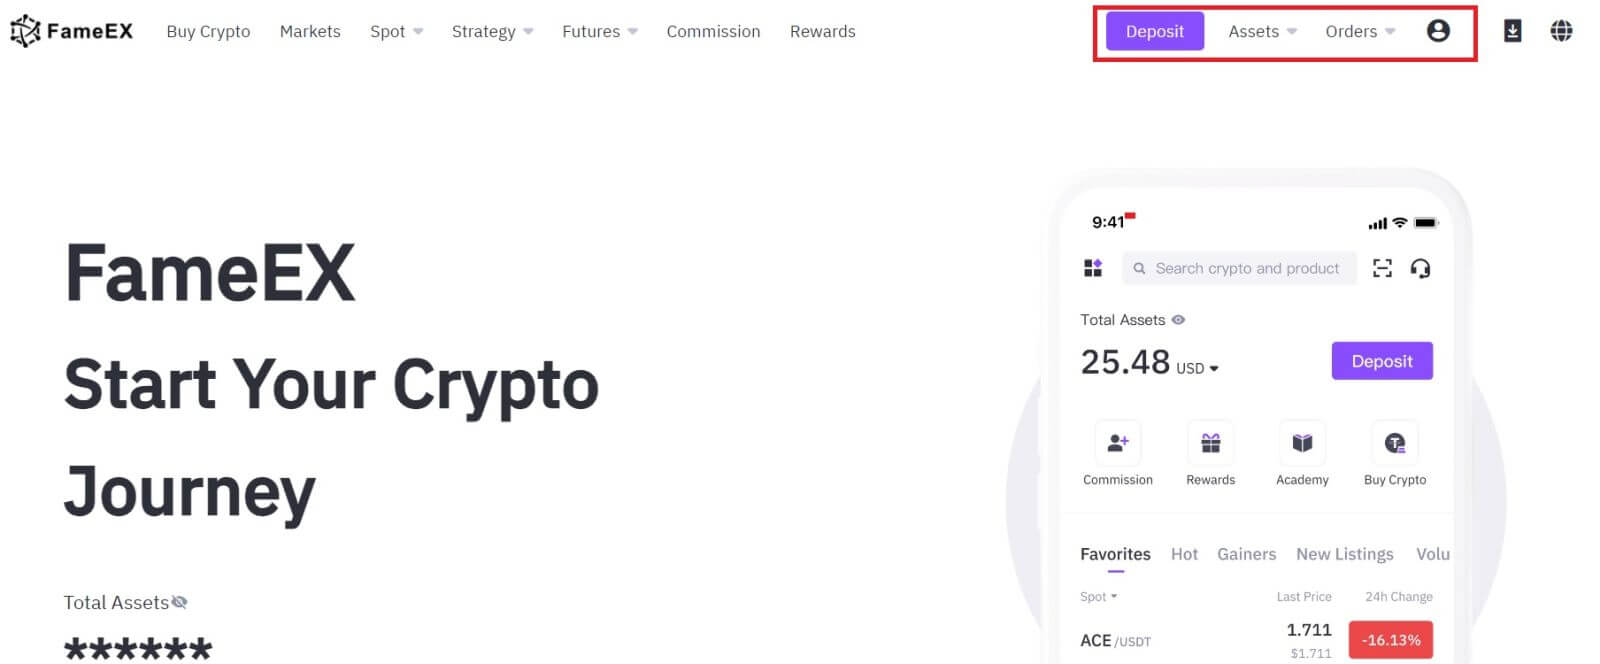
6. Congratulations, you have successfully registered an account on FameEX via Google.
How to Register an Account on FameEX with Apple ID
1. Go to the FameEX website and click on [Sign Up] or [Register].
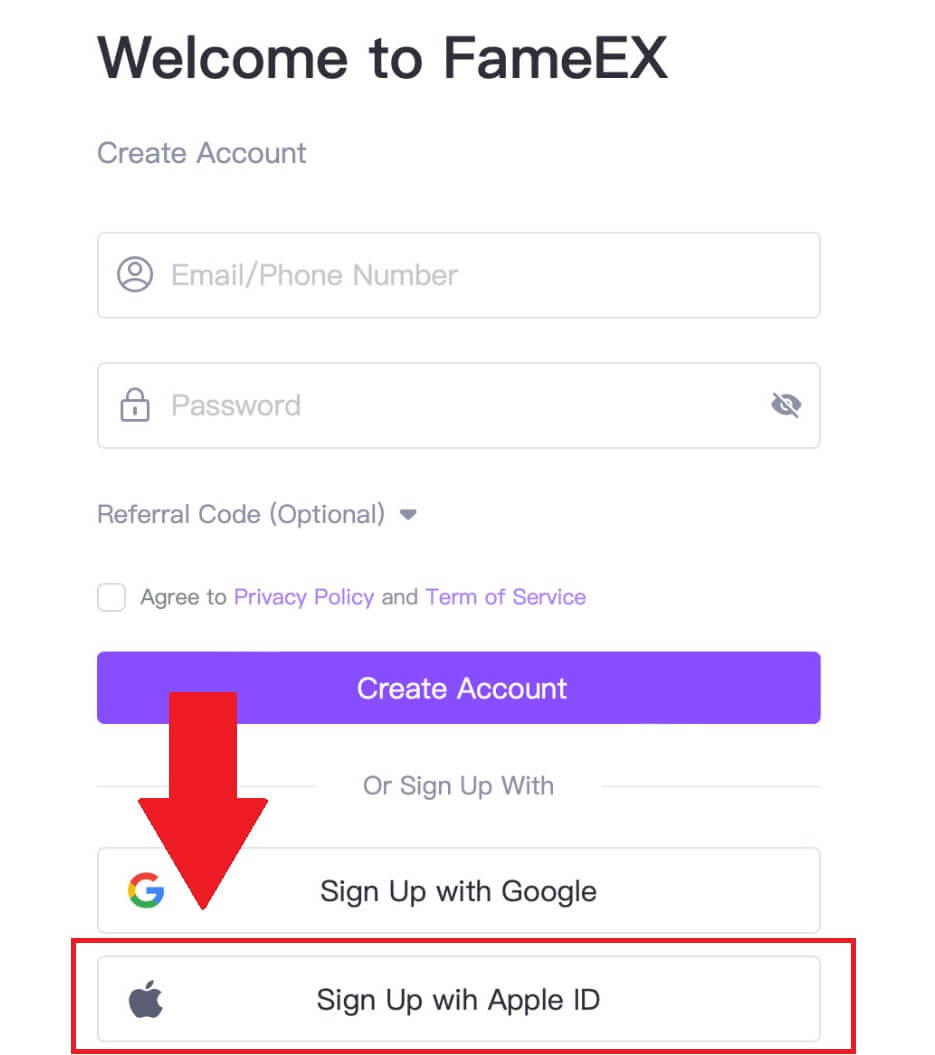
2. Click on the [Apple] button and a pop-up window will appear, and you will be prompted to sign in to FameEX using your Apple ID.
3. Enter your Apple ID and password to sign in to FameEX.
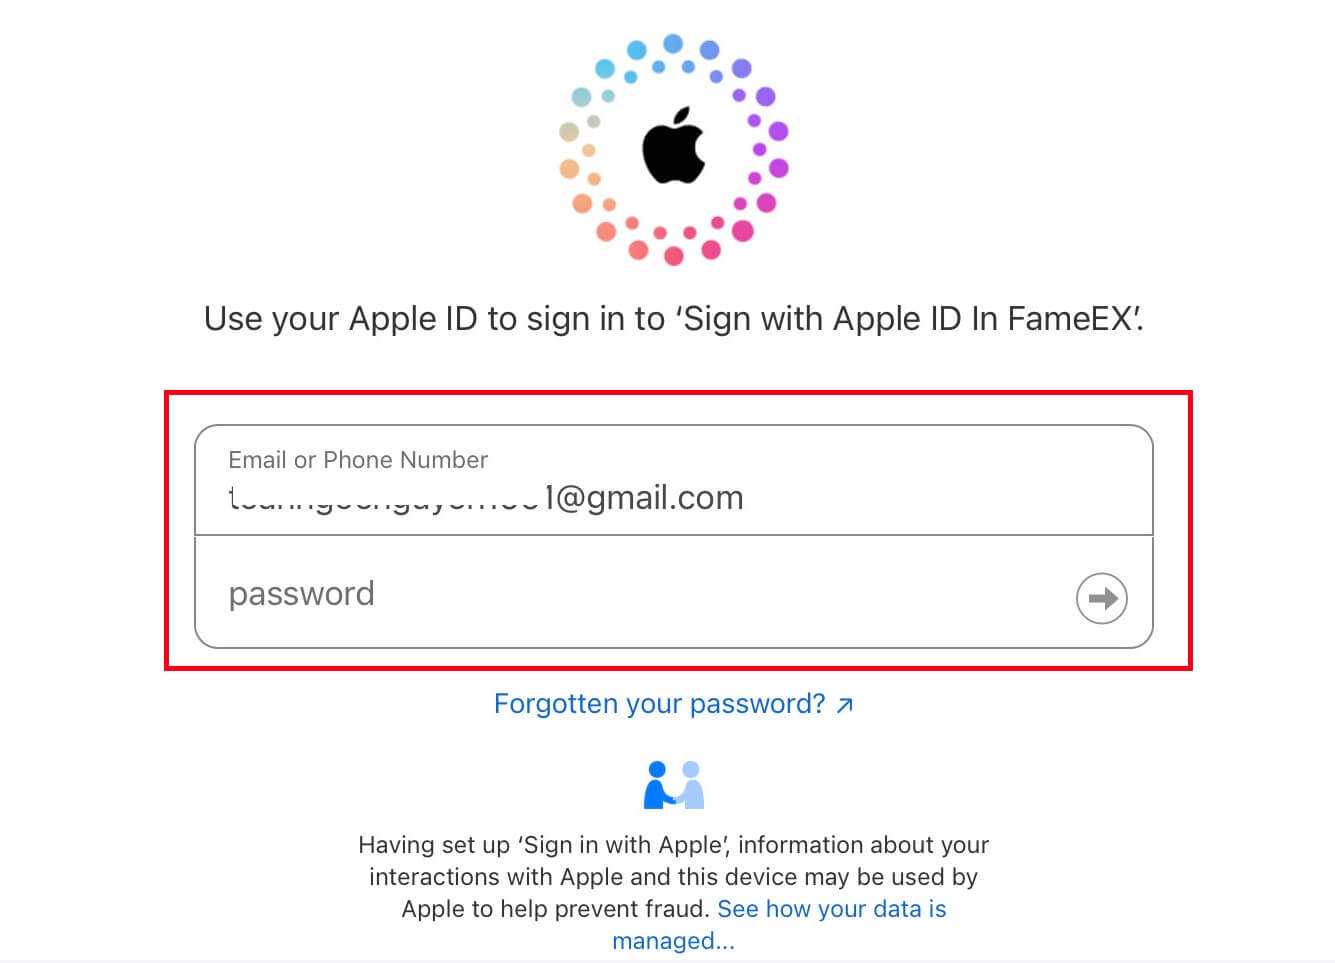
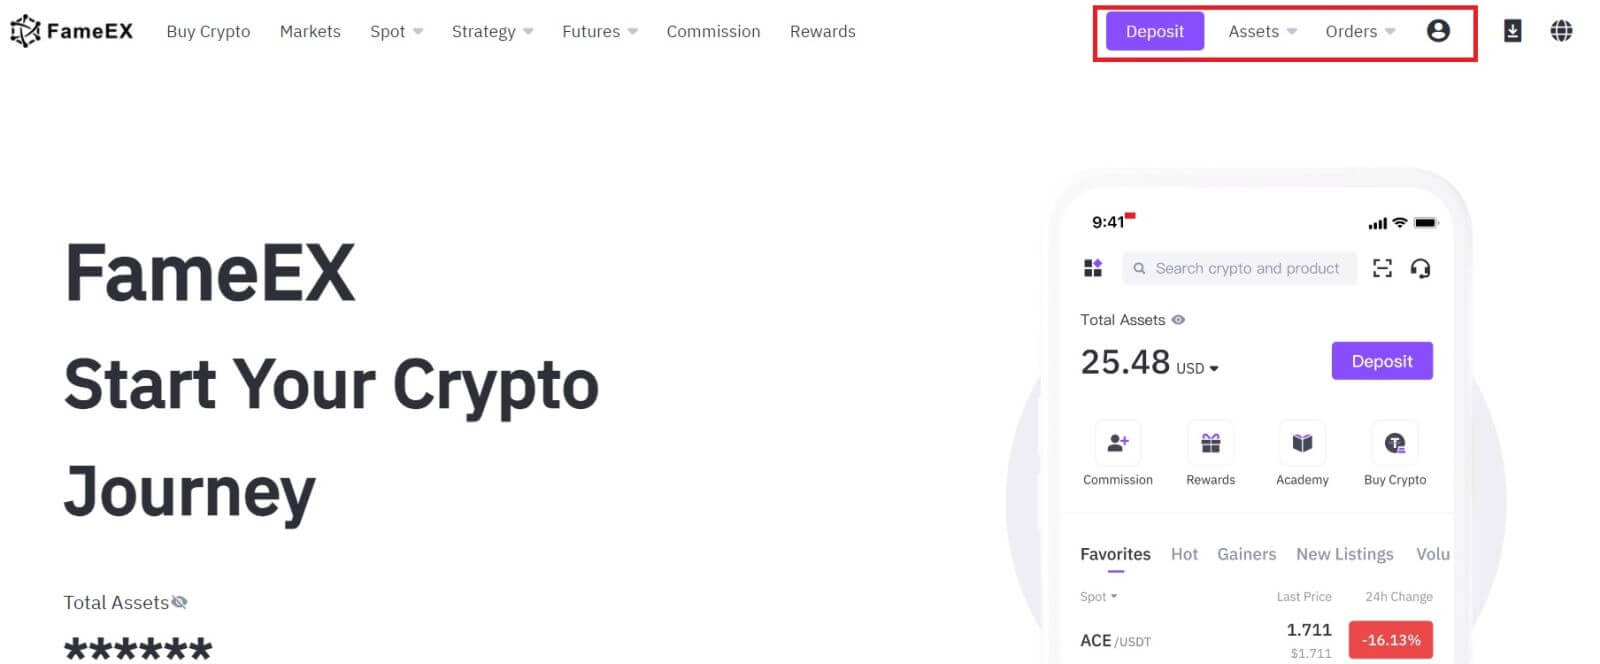
4. After that, you have successfully registered an account on FameEX via Apple ID.
How to Register an Account on the FameEX App
1. You need to install the FameEX application from the Google Play Store or App Store to log in to the FameEX account for trading.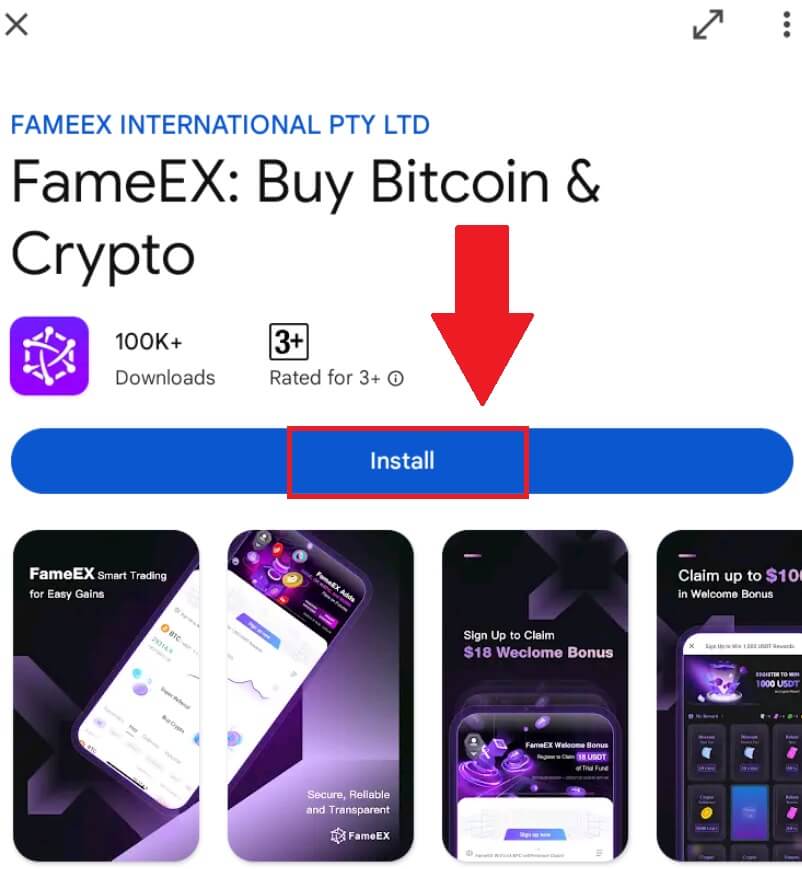
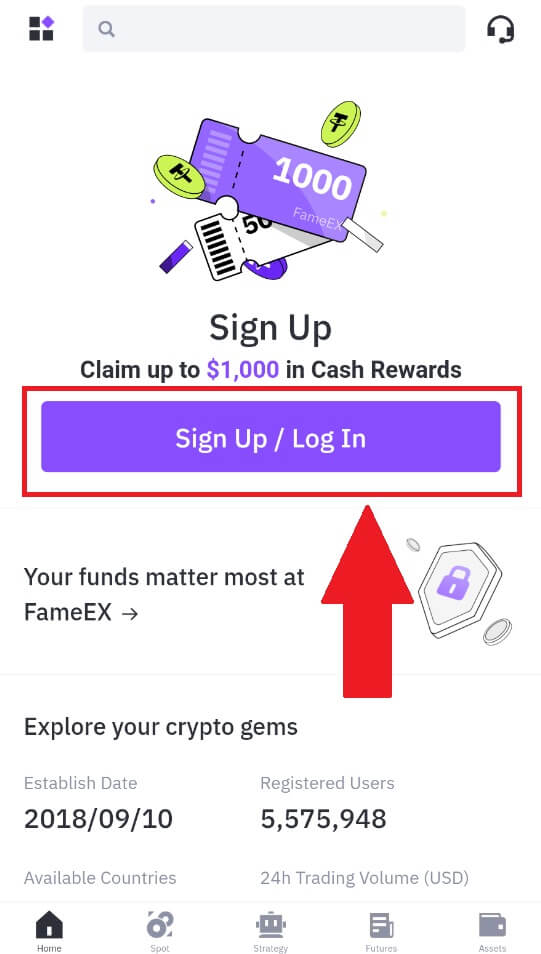
2. Open the FameEX app and tap [Sign Up/Log In].
3. Enter your [Email] or [Phone Number] and create your secure password. Tick the box, and then click on [Create Account].
Note:
- The 8-20 character password.
- Include at least 3 of the following: upper case, lower case, digit and symbol.
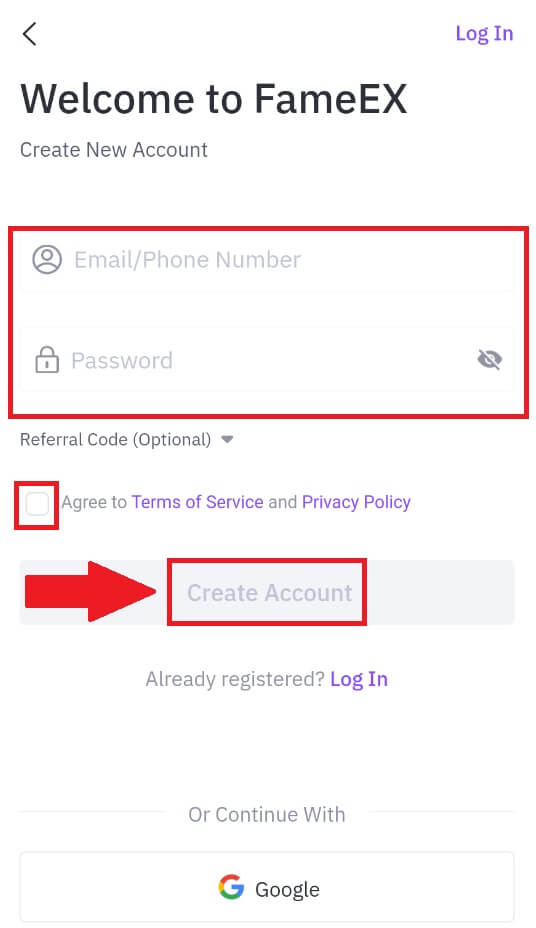
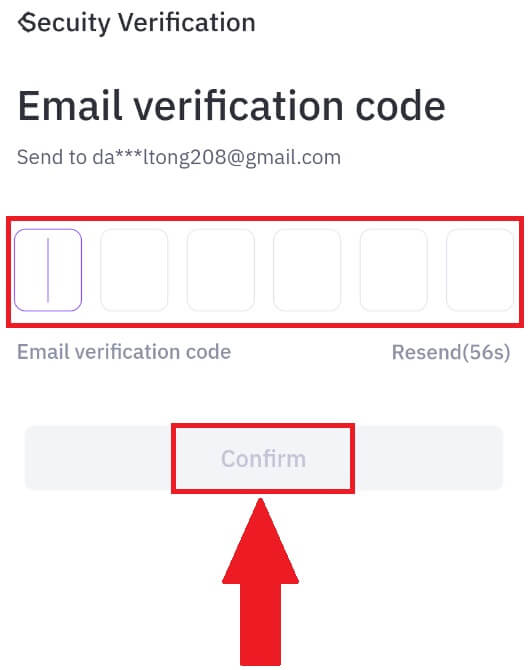
4. You will receive a 6-digit verification code in your email or phone number. Enter the code to continue and tap [Confirm].
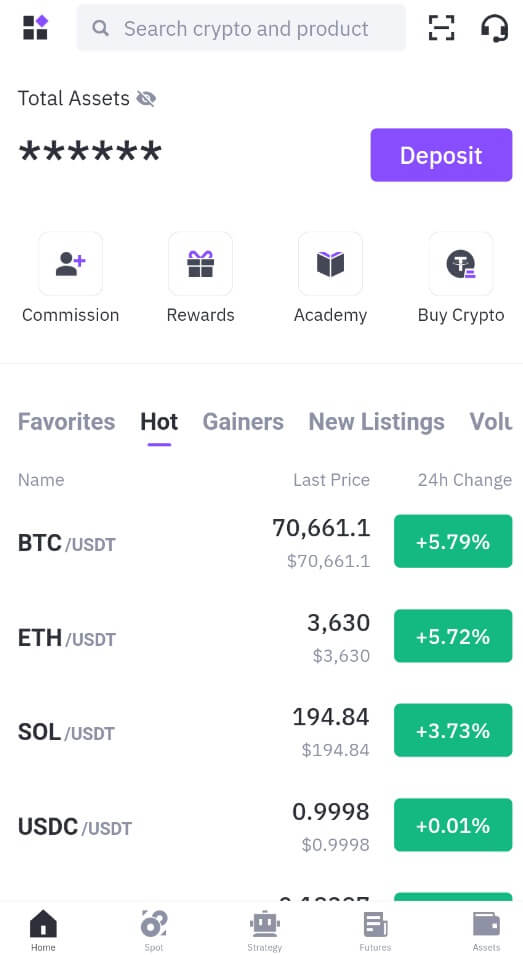
5. Congratulations, you have successfully registered on FameEX App.
Frequently Asked Questions (FAQ)
Why Can’t I Receive Emails from FameEX?
If you are not receiving emails sent from FameEX, please follow the instructions below to check your email’s settings:-
Are you logged in to the email address registered to your FameEX account? Sometimes you might be logged out of your email on your device and hence can’t see FameEX emails. Please log in and refresh.
-
Have you checked the spam folder of your email? If you find that your email service provider is pushing FameEX emails into your spam folder, you can mark them as “safe” by whitelisting FameEX email addresses. You can refer to How to Whitelist FameEX Emails to set it up.
-
Is the functionality of your email client or service provider normal? To be sure that your firewall or antivirus program isn’t causing a security conflict, you can verify the email server settings.
-
Is your inbox packed with emails? You won’t be able to send or receive emails if you have reached the limit. To make room for new emails, you can remove some of the older ones.
-
Register using common email addresses like Gmail, Outlook, etc., if at all possible.
How come I can’t get SMS verification codes?
FameEX is always working to improve the user experience by expanding our SMS Authentication coverage. Nonetheless, certain nations and regions aren’t currently supported.Please check our global SMS coverage list to see if your location is covered if you are unable to enable SMS authentication. Please use Google Authentication as your primary two-factor authentication if your location is not included on the list.
The following actions should be taken if you are still unable to receive SMS codes even after you have activated SMS authentication or if you are currently living in a nation or region covered by our global SMS coverage list:
- Make sure there is a strong network signal on your mobile device.
- Disable any call blocking, firewall, anti-virus, and/or caller programs on your phone that might be preventing our SMS Code number from working.
- Turn your phone back on.
How to Change My Email Account on FameEX?
1. Go to the FameEX website, click on the profile icon, and select [Security].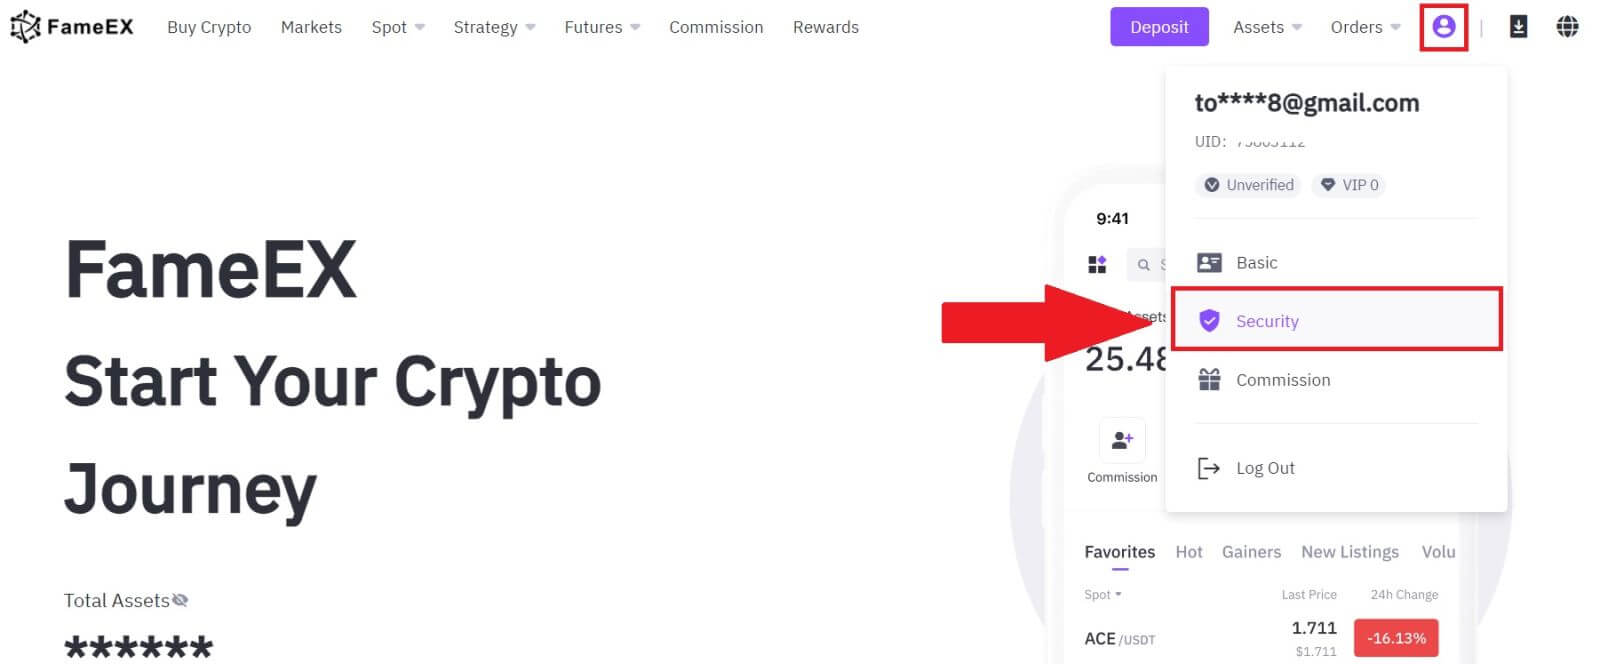
2. On the email section, click on [Change].
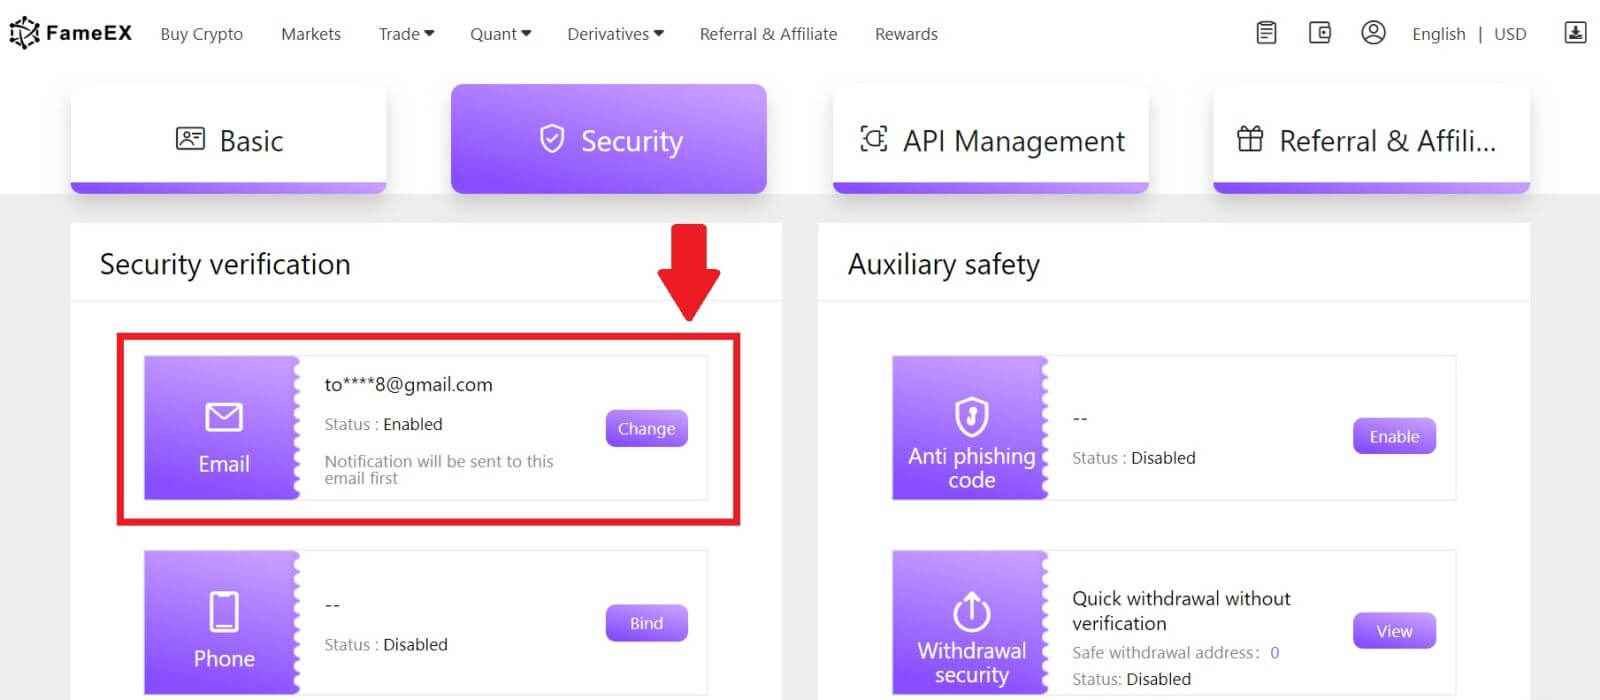
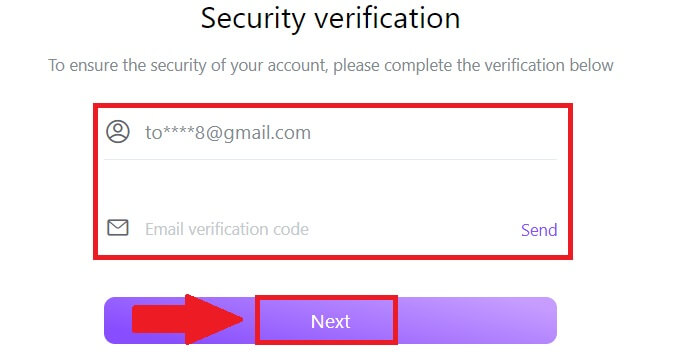
3. Enter your email verification code by clicking on [Send]. Then click [Next] to continue.
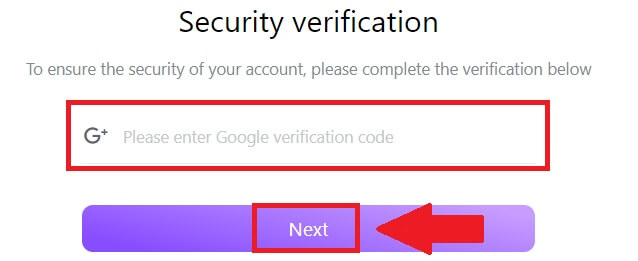
4. Enter your Google Authenticator code and click [Next].
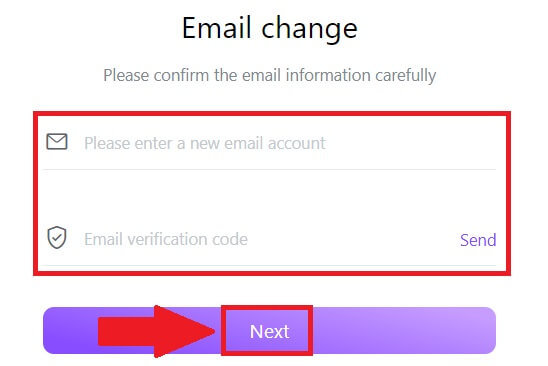
5. Enter your new email and your new email verification code and click [Next]. After that, you have successfully changed your email.
Note:
- After changing your email address, you will need to log in again.
- For your account security, withdrawals will be temporarily suspended for 24 hours after changing your email address
How to Verify Account on FameEX
What is KYC FameEX?
KYC stands for Know Your Customer, emphasizing a thorough understanding of customers, including the verification of their real names.
Why is KYC important?
- KYC serves to fortify the security of your assets.
- Different levels of KYC can unlock varying trading permissions and access to financial activities.
- Completing KYC is essential to elevate the single transaction limit for both buying and withdrawing funds.
- Fulfilling KYC requirements can amplify the benefits derived from futures bonuses.
How to complete Identity Verification on FameEX (Web)
Primary KYC Verification on FameEX
1. Go to the FameEX website, click on the profile icon, and select [Basic].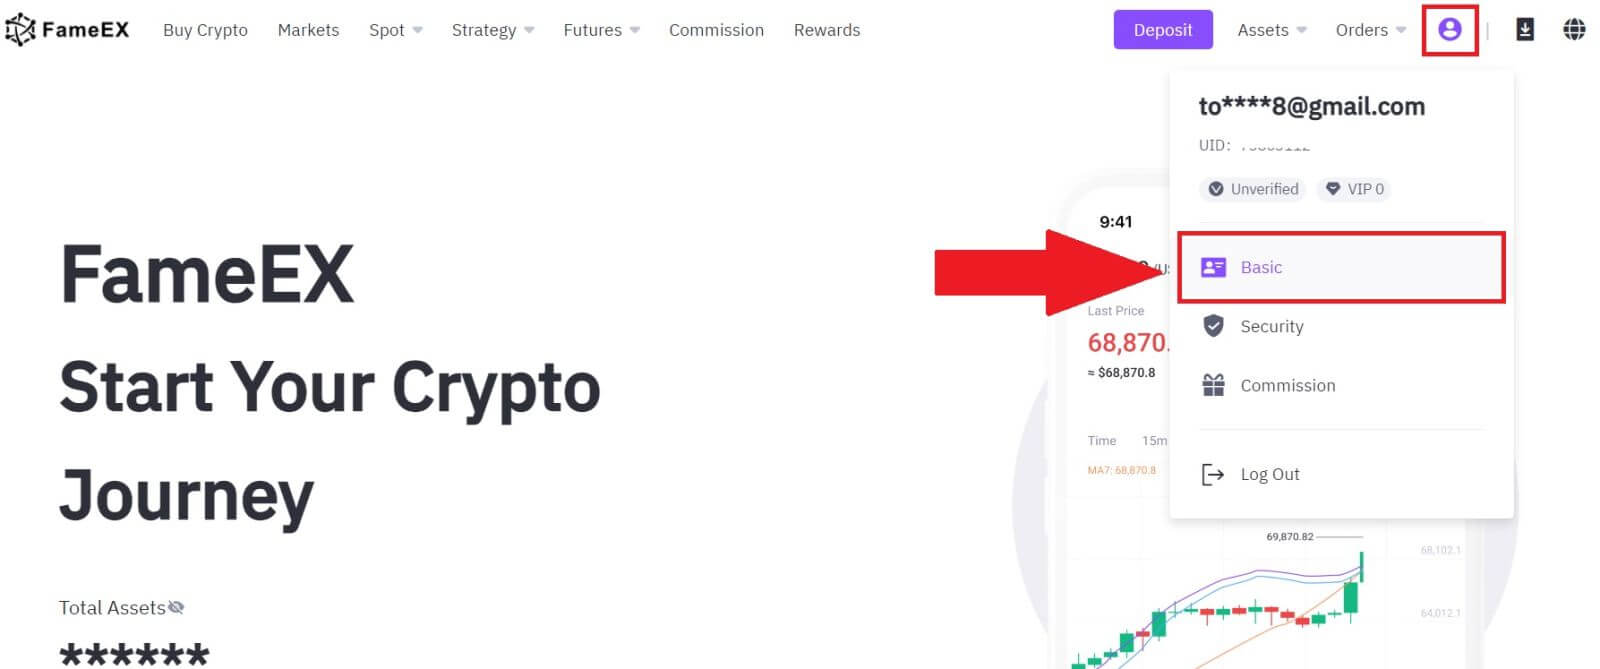
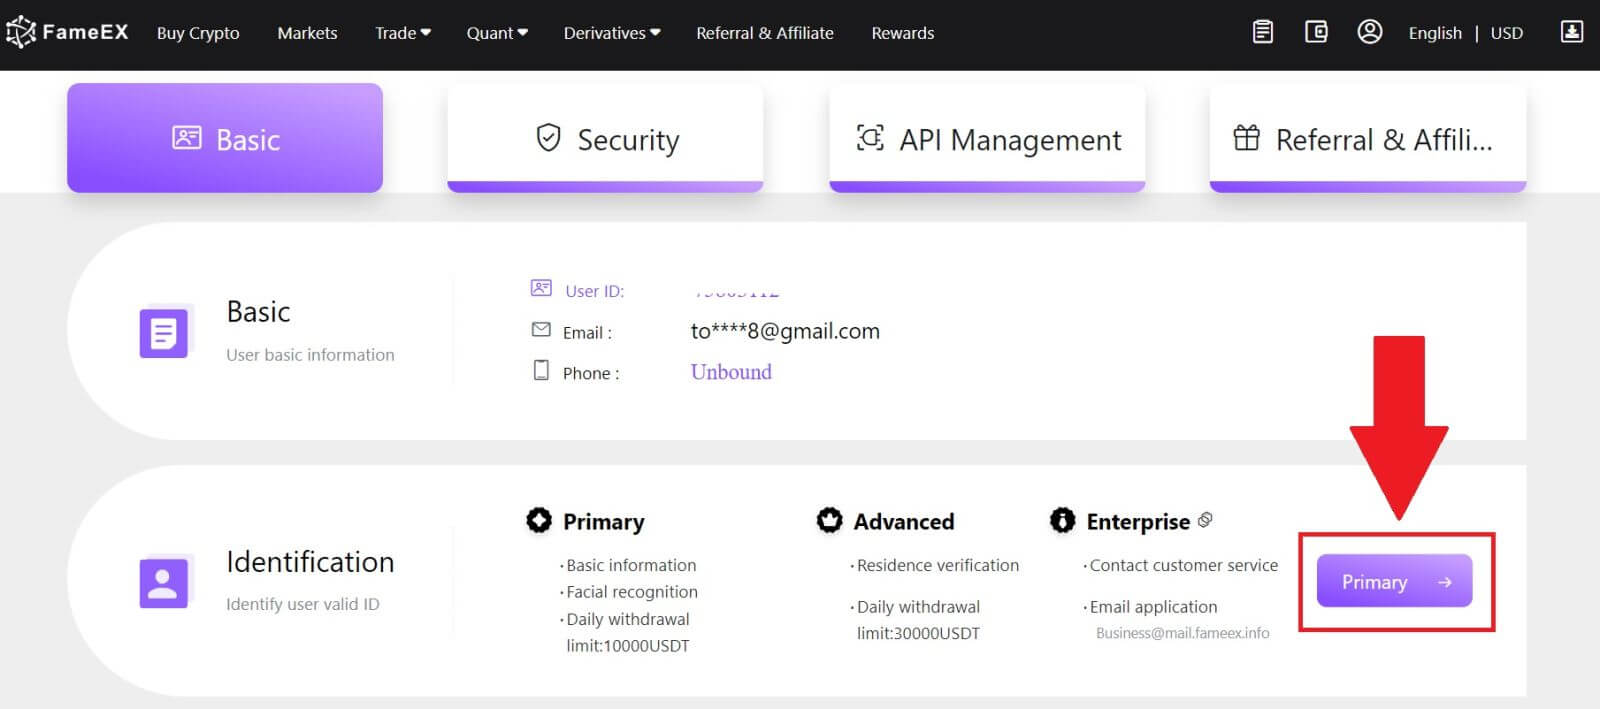
2. On the Identification section, click on [Primary].
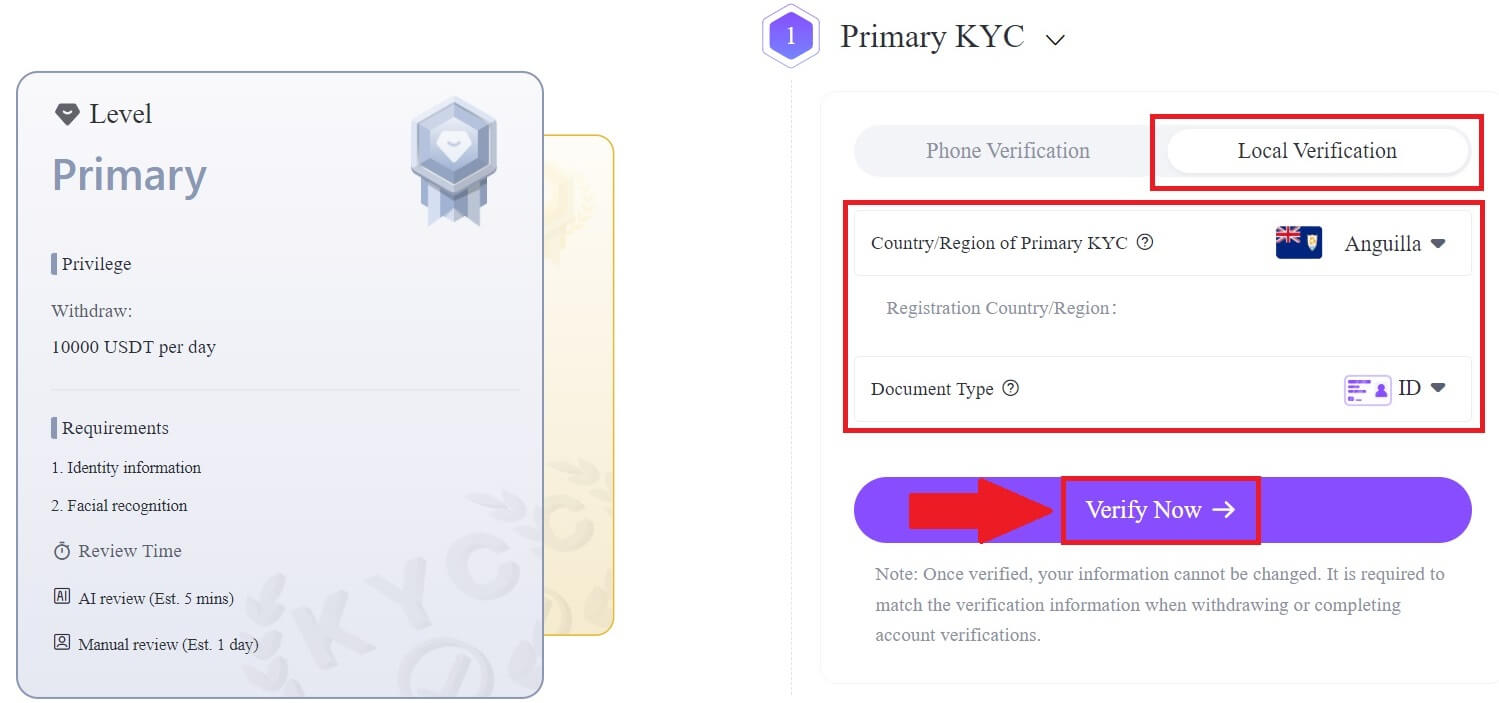
3. Select [Local Verification], choose your [Country/Region] and your [Document Type], then click on [Verify Now].
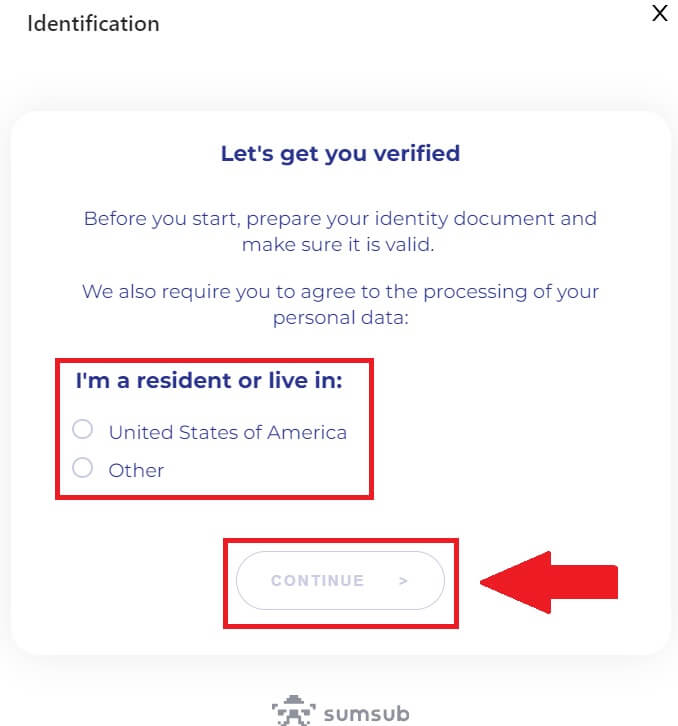
4. Next, answer the question below before you start and click on [Continue].
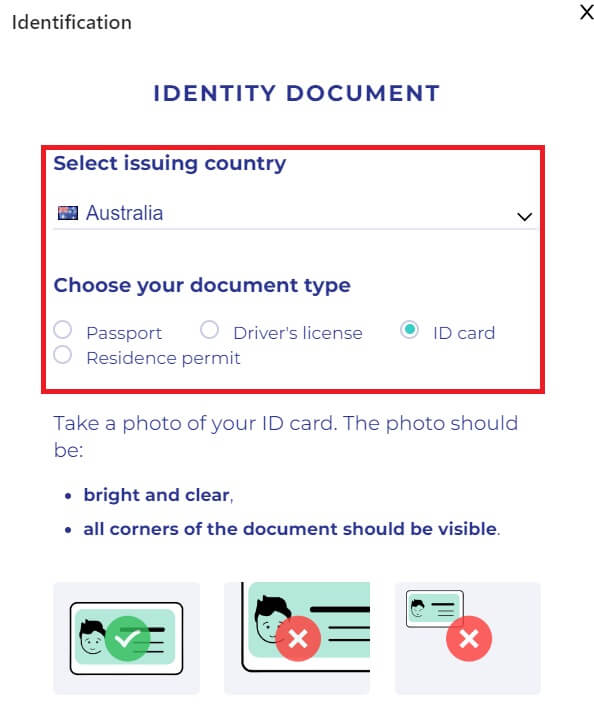
5. Select your document type and your document issuing country.
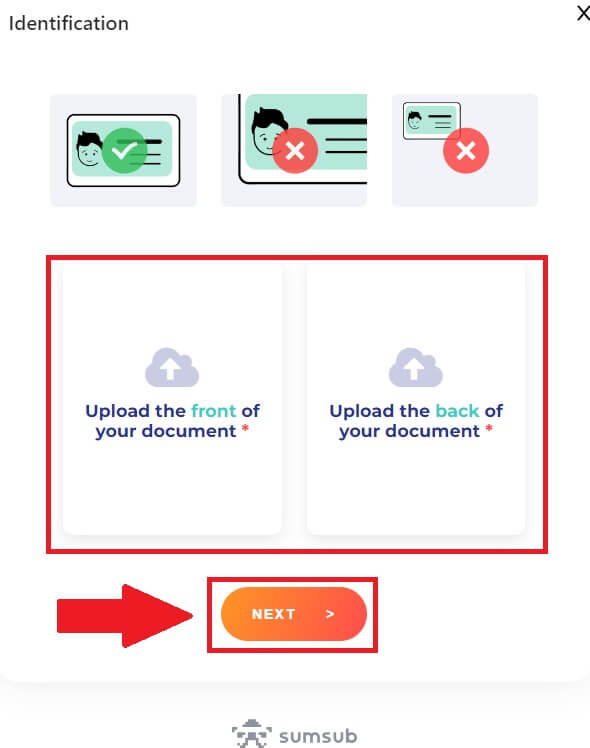
Begin by taking a photo of your document. Following that, upload clear images of both the front and back of your ID into the designated boxes. Once both pictures are distinctly visible in the assigned boxes, click [Next] to proceed.
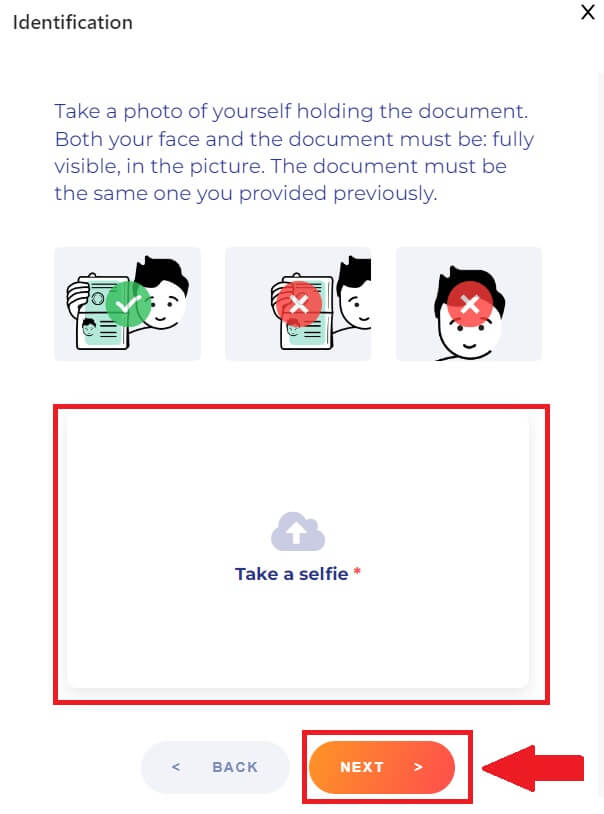
6. Next, take a selfie of you holding the document and click [Next].
7. After that, wait for the FameEX team to review, and you have completed your primary verification.

Advanced KYC Verification on FameEX
1. Go to the FameEX website, click on the profile icon, and select [Basic].
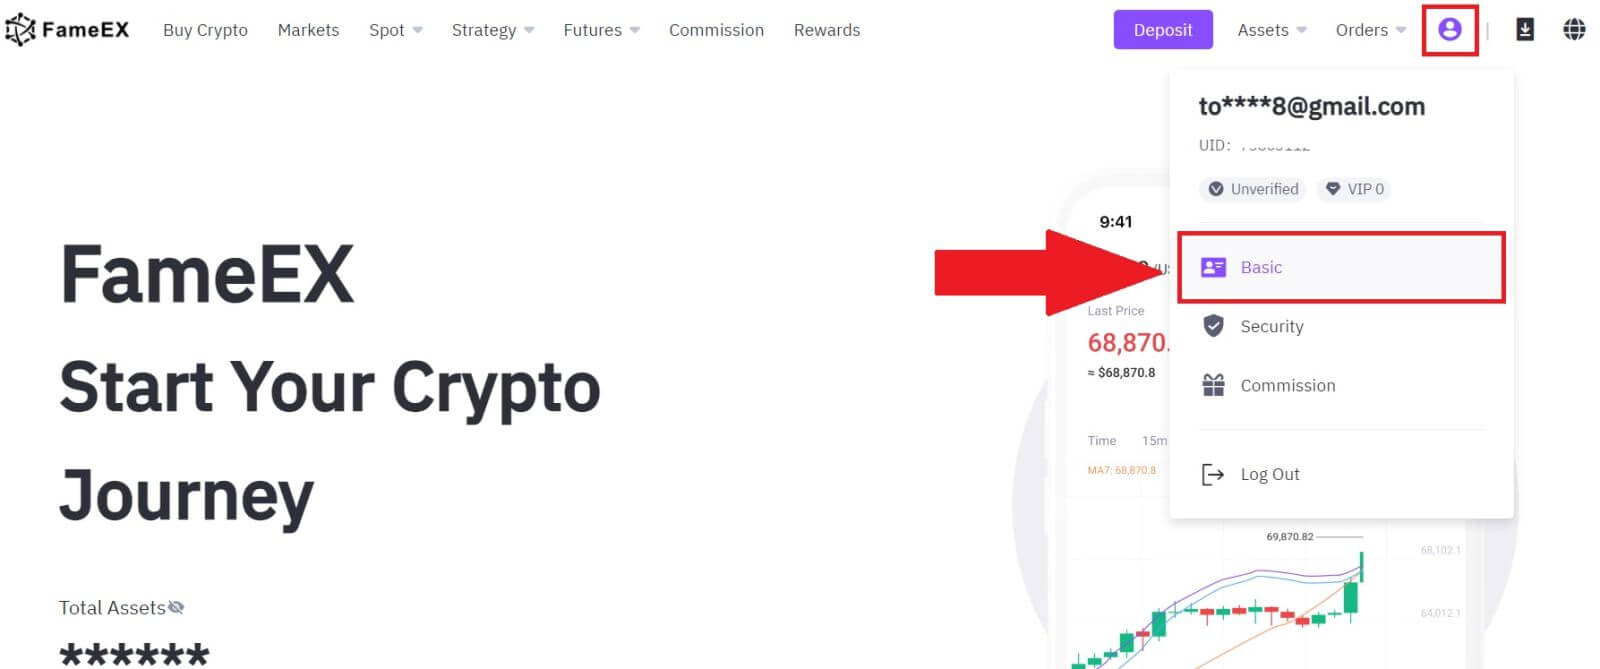
2. On the Identification section, click on [Advanced].
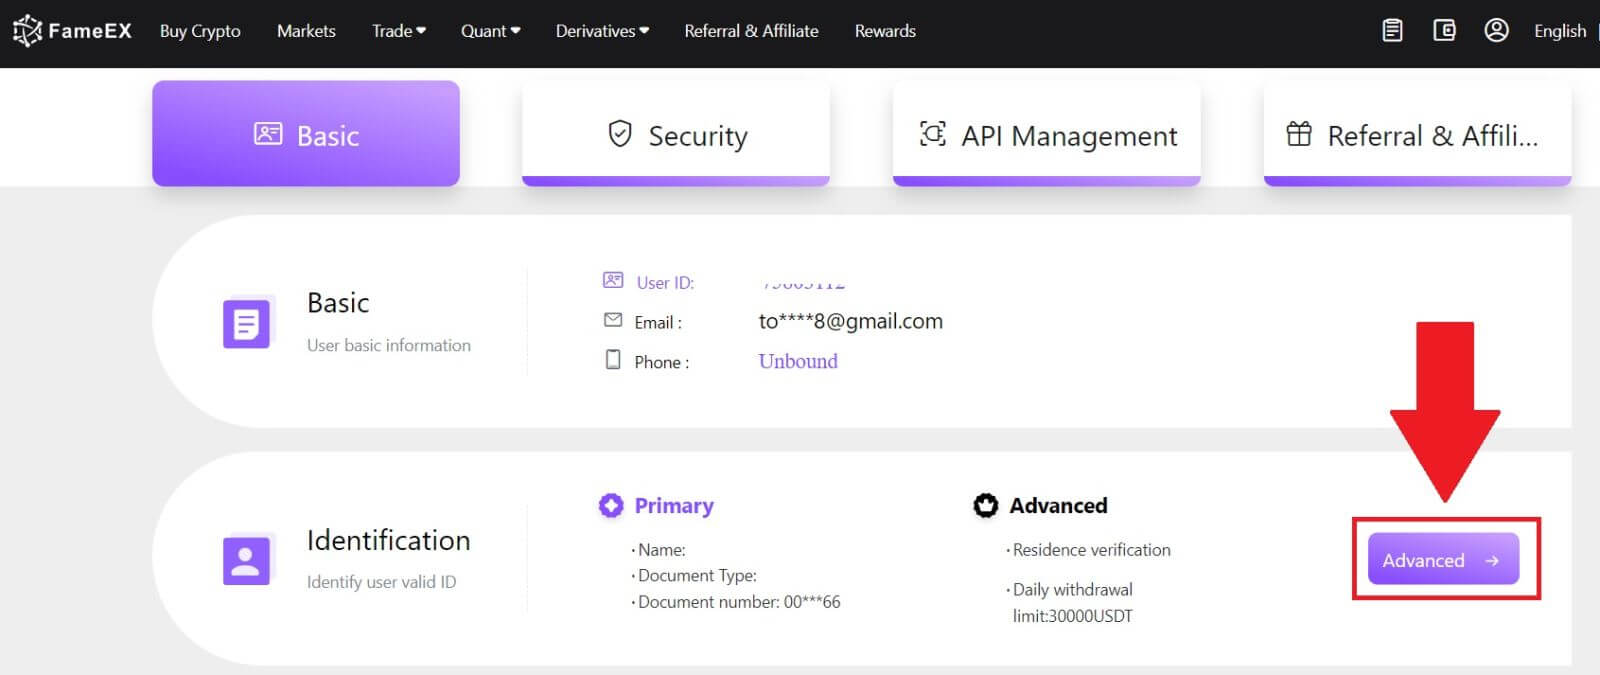
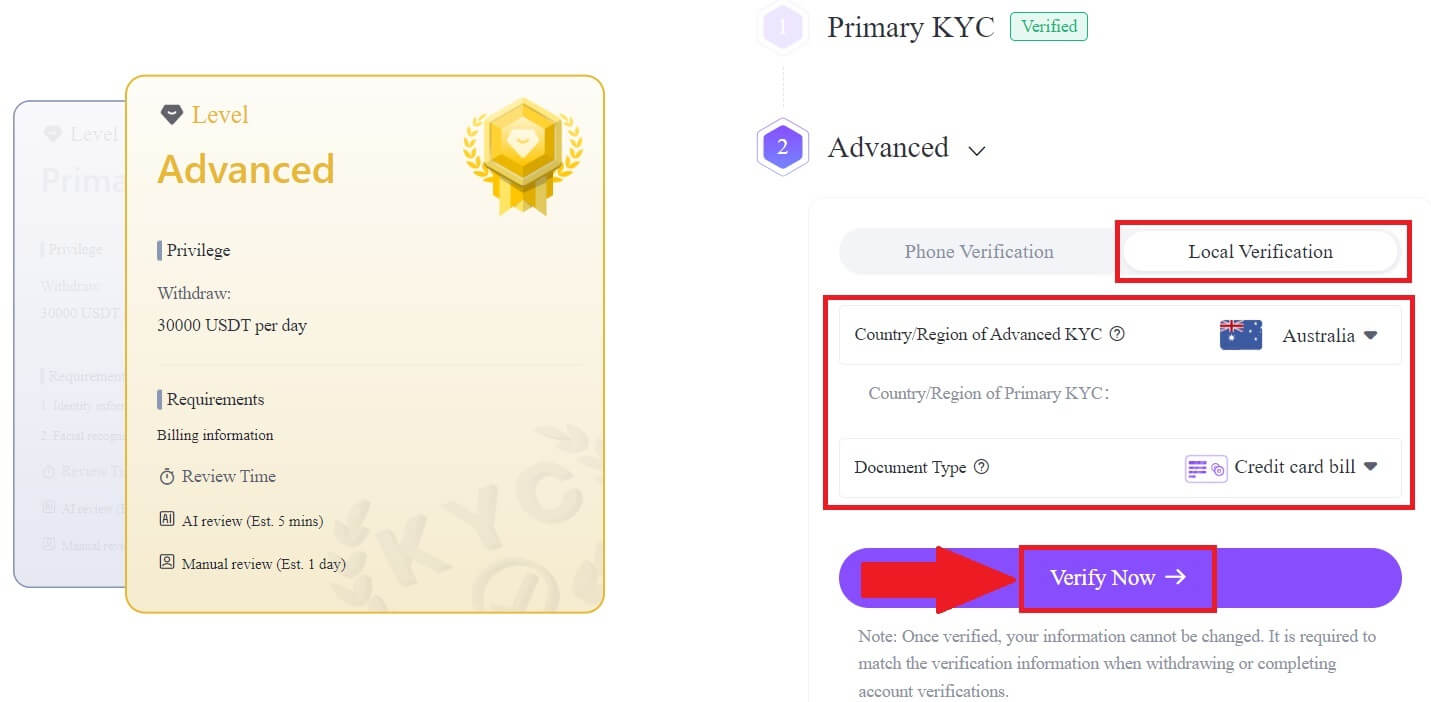
3. Select [Local Verification], choose your [Country/Region] and your [Document Type], then click on [Verify Now].
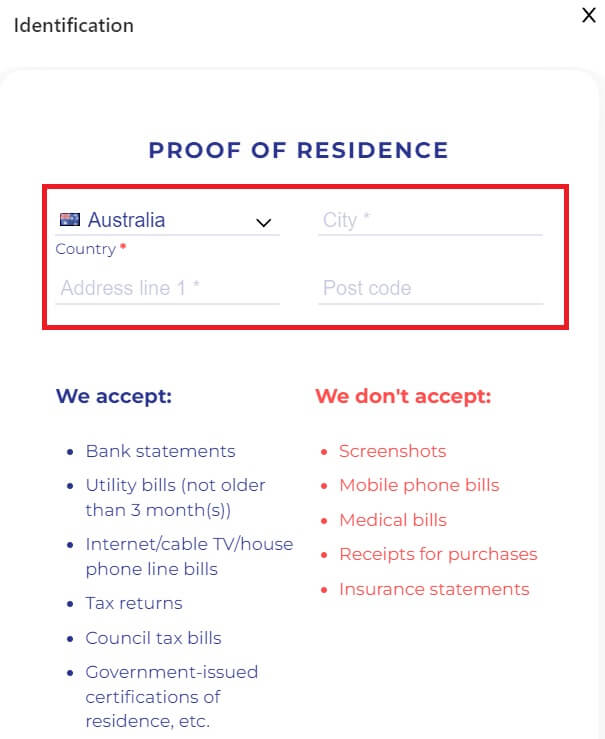
4. Enter your address and upload your document, then click [Next].
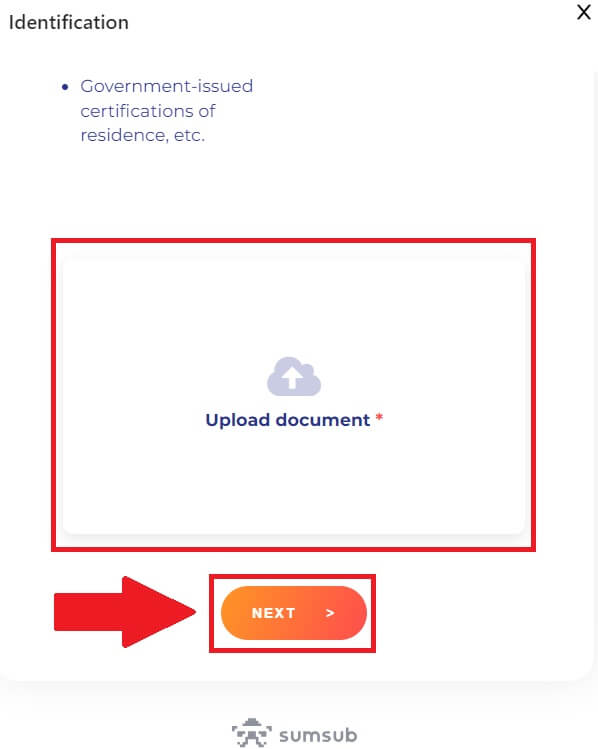
5. After that, wait for the FameEX team to review, and you have completed your advanced verification.

How to complete Identity Verification on FameEX (App)
Primary KYC Verification on FameEX
1. Open your FameEX App, tap on the icon on the top left.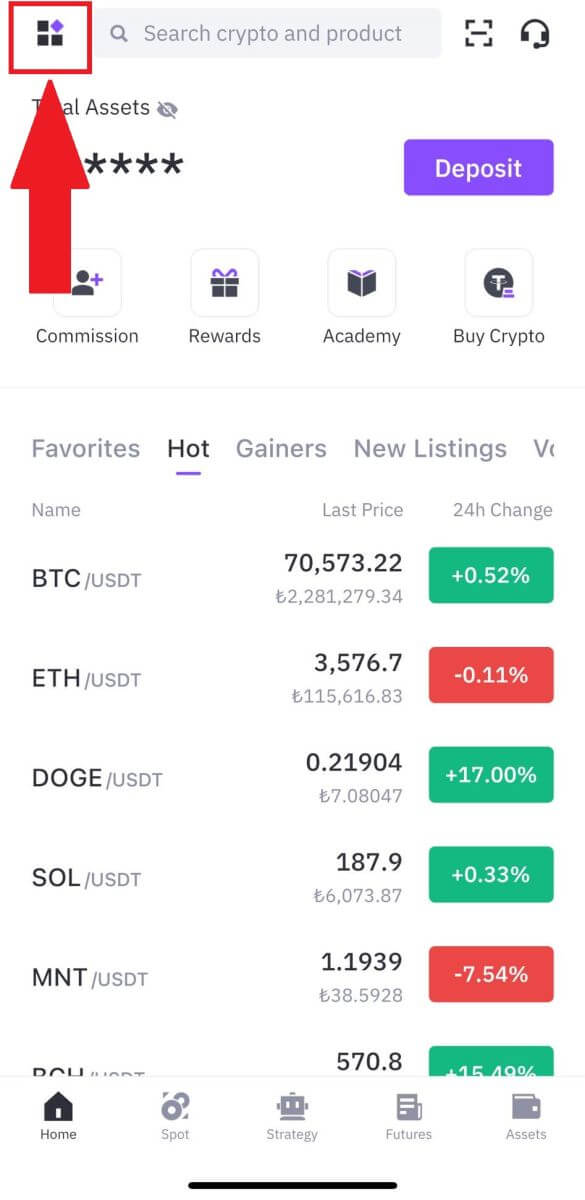
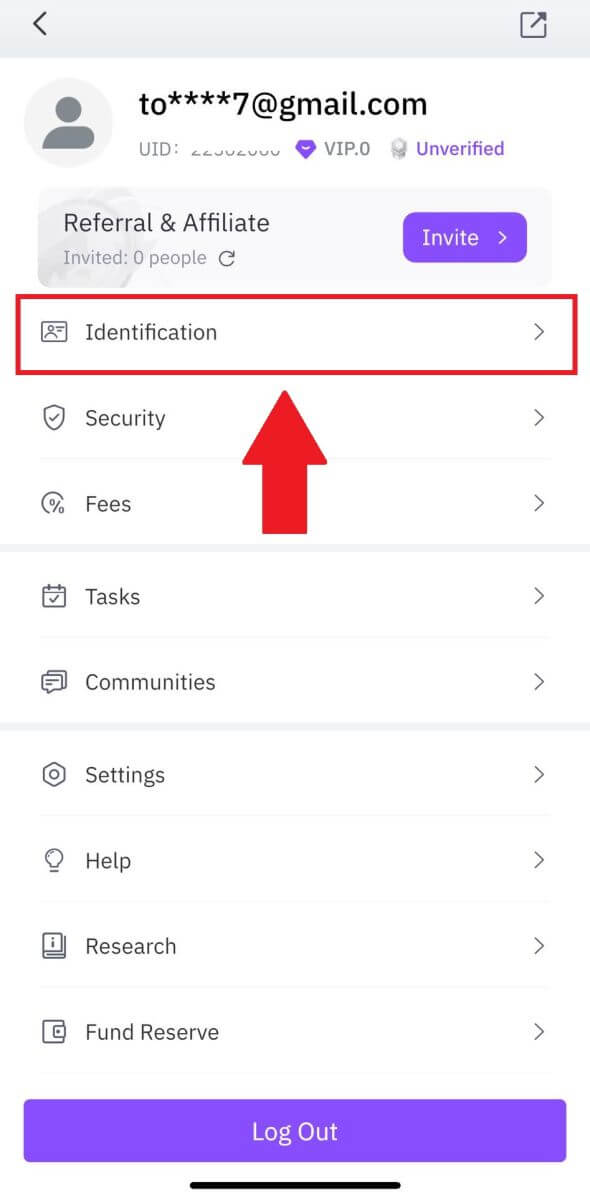
2. Select [Identification] and tap on [Verify].
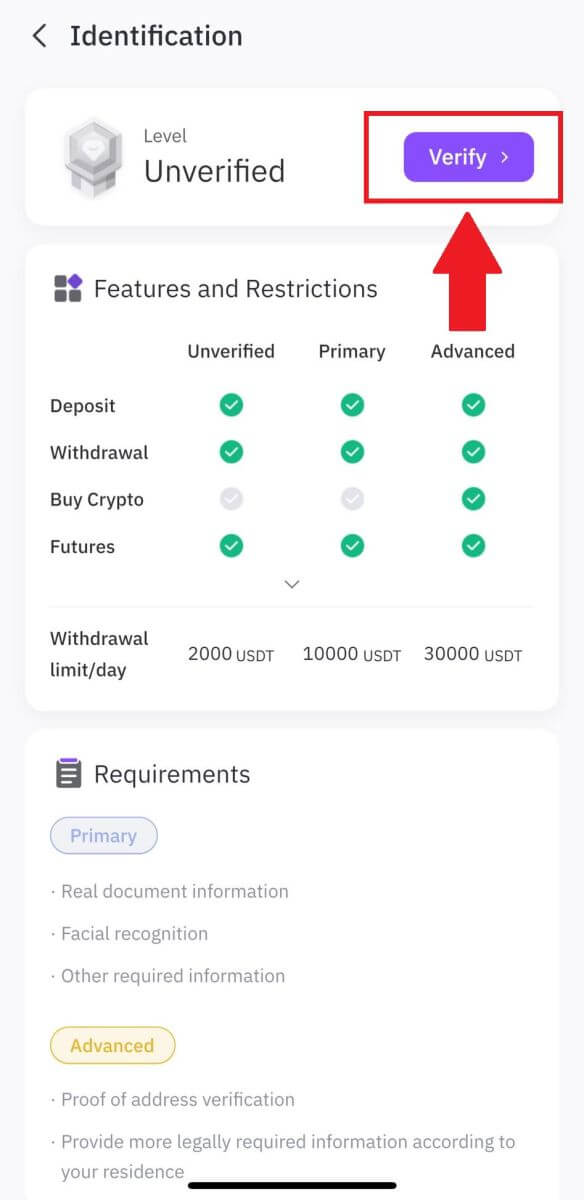
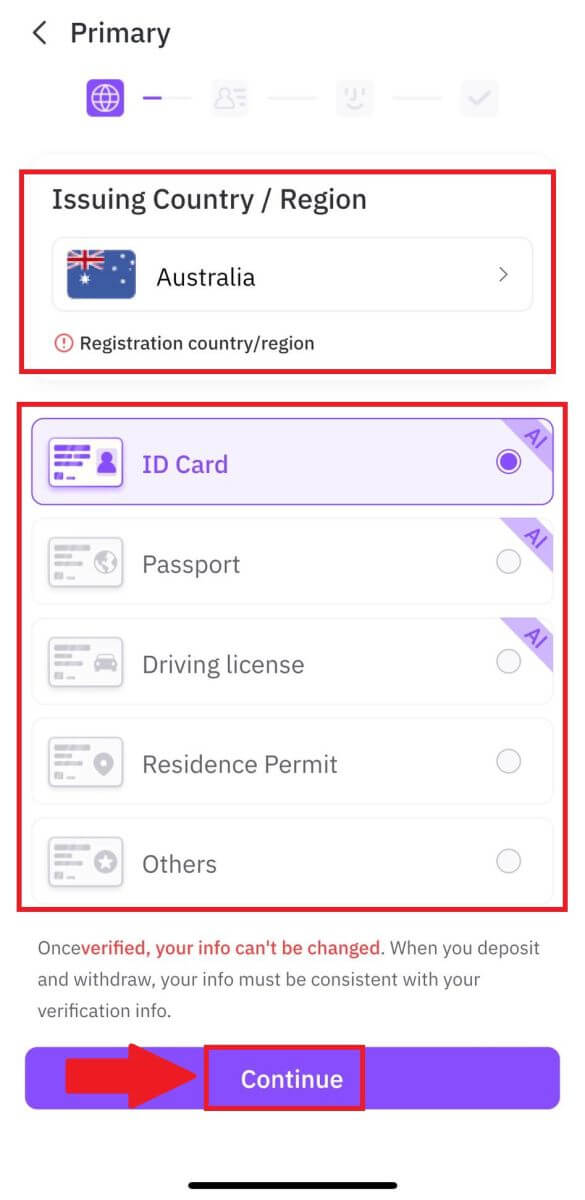
3. Choose your [Issuing Country/Region] and your [Document Type], then tap on [Continue].
4. Begin by uploading a photo of your document. Following that, upload clear images of both the front and back of your ID into the designated boxes. Once both pictures are distinctly visible in the assigned boxes, click [Continue] to proceed.
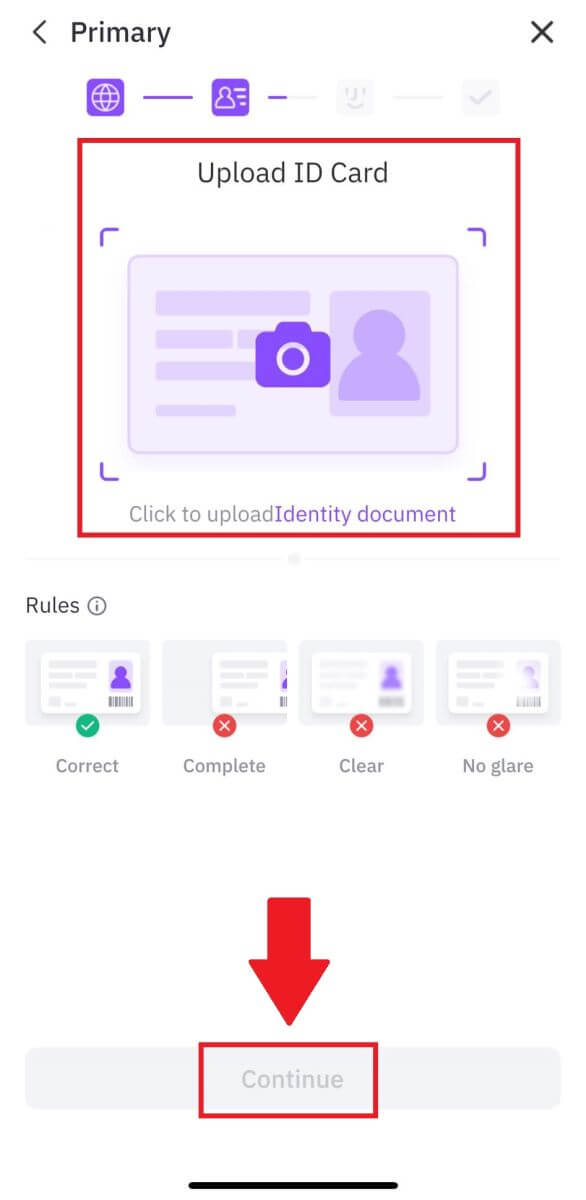
5. Next, take a selfie of you holding the document to continue.

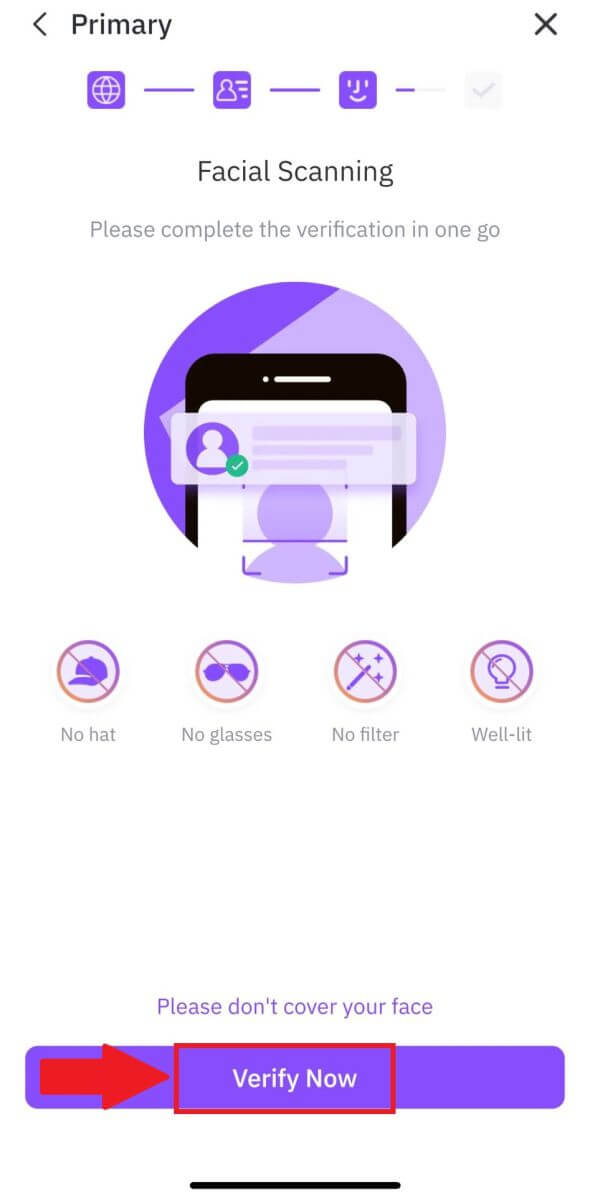
6. Lastly, tap on [Verify Now] to do your Facial Scanning to complete the primary verification.
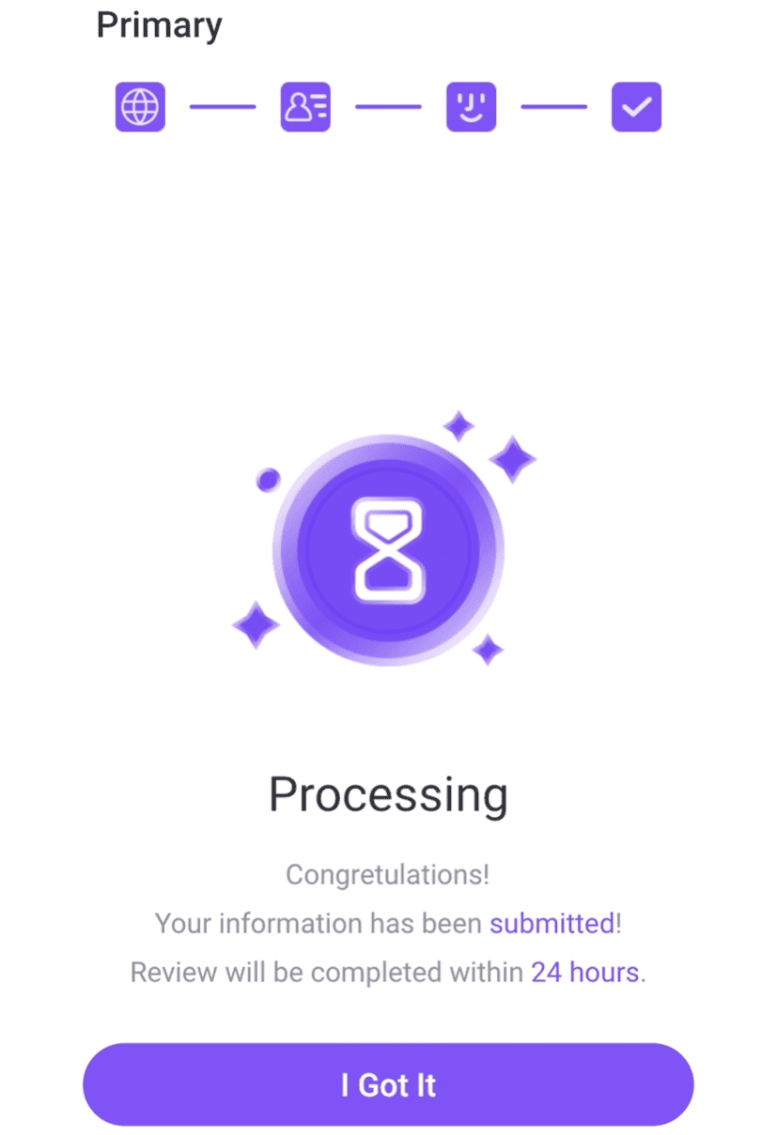
7. After that, wait for the FameEX team to review, and you have completed your primary verification.
Advanced KYC Verification on FameEX
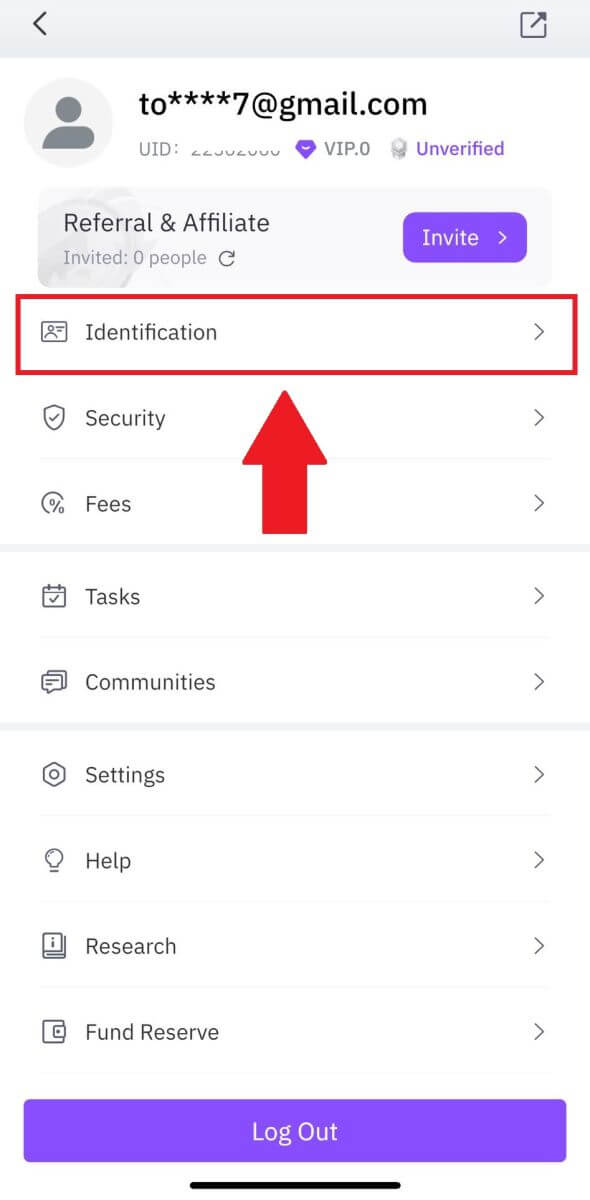
1. Open your FameEX App, tap on the icon on the top left.
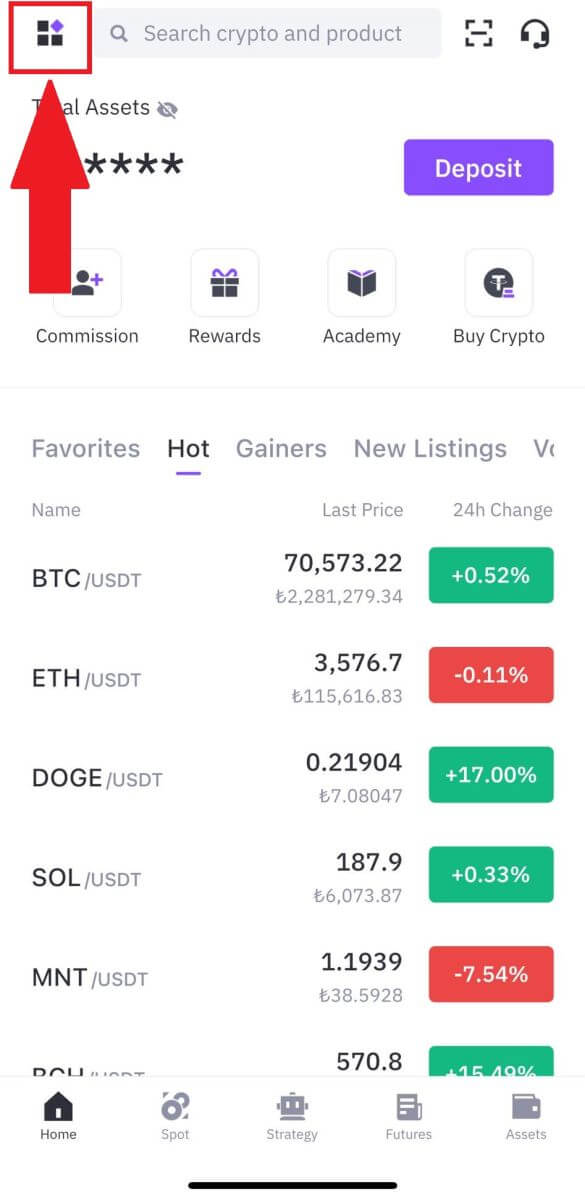
2. Select [Identification] and tap on [Upgrade].
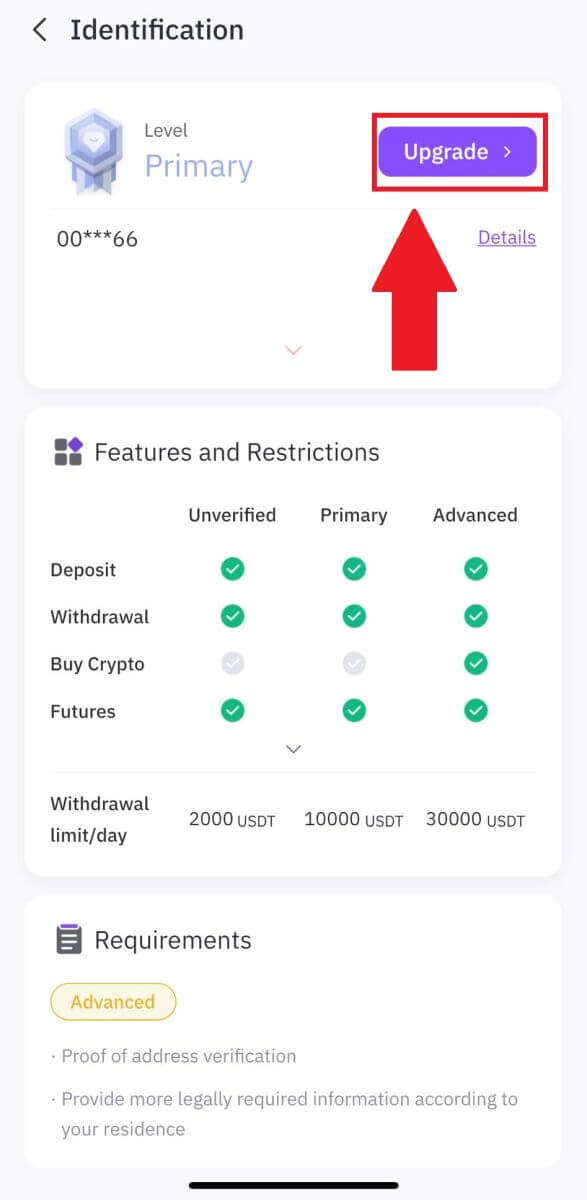
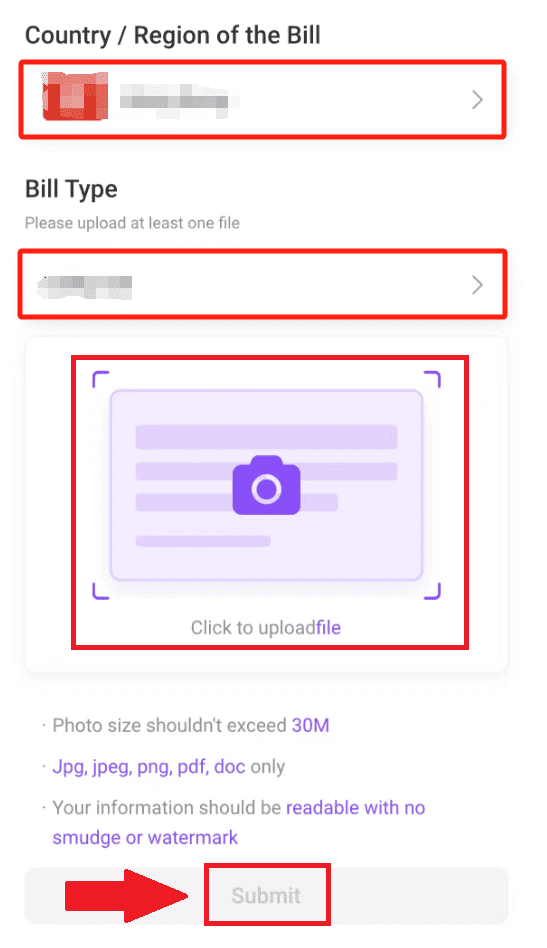
3. Select Country/Region and Bill Type, and tap Upload Document to upload the corresponding documents. Lastly, tap [Submit].
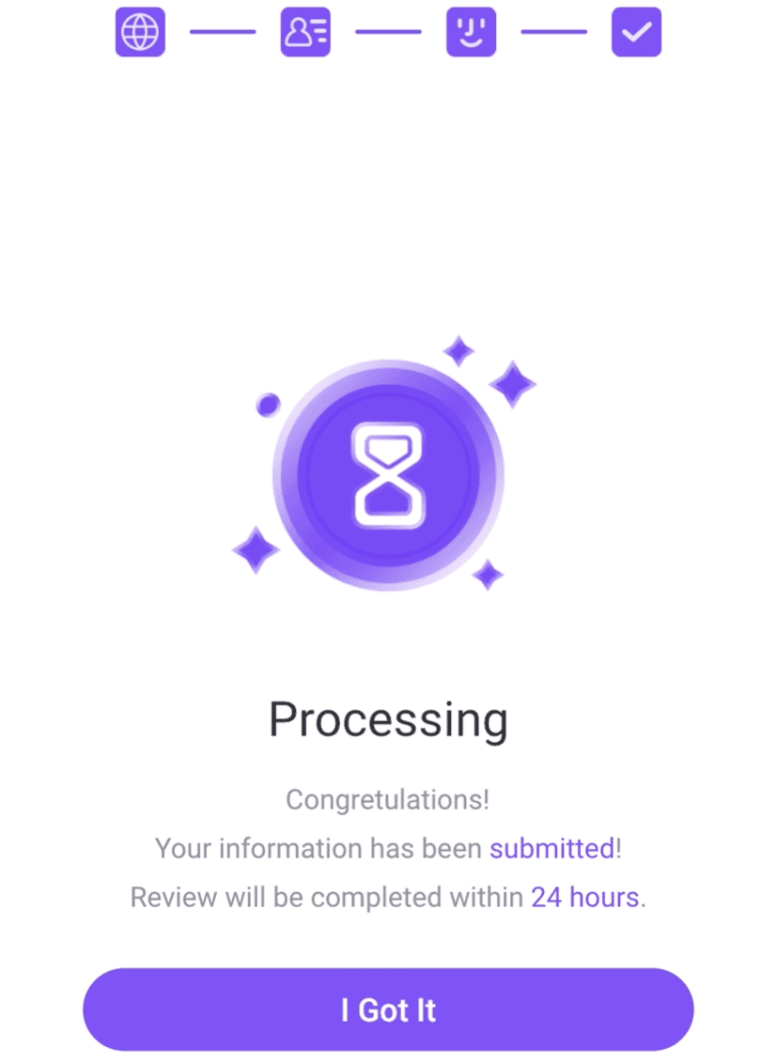
4. After that, wait for the FameEX team to review, and you have completed your advanced verification.
Frequently Asked Questions (FAQ)
Unable to upload photo during KYC Verification
If you encounter difficulties uploading photos or receive an error message during your KYC process, please consider the following verification points:- Ensure the image format is either JPG, JPEG, or PNG.
- Confirm that the image size is below 5 MB.
- Use a valid and original ID, such as a personal ID, driver’s license, or passport.
- Your valid ID must belong to a citizen of a country that allows unrestricted trading, as outlined in "II. Know-Your-Customer and Anti-Money-Laundering Policy" - "Trade Supervision" in the FameEX User Agreement.
- If your submission meets all the above criteria, but KYC verification remains incomplete, it might be due to a temporary network issue. Please follow these steps for resolution:
- Wait for some time before resubmitting the application.
- Clear the cache in your browser and terminal.
- Submit the application through the website or app.
- Try using different browsers for the submission.
- Ensure your app is updated to the latest version.
Why can’t I receive the email verification code?
Please check and try again as follows:
- Check the blocked mail spam and trash;
- Add the FameEX notification email address ([email protected]) to the email whitelist so that you can receive the email verification code;
- Wait for 15 minutes and try.
Common Errors During the KYC Process
- Taking unclear, blurry, or incomplete photos may result in unsuccessful KYC verification. When performing face recognition, please remove your hat (if applicable) and face the camera directly.
- KYC process is connected to a third-party public security database, and the system conducts automatic verification, which cannot be manually overridden. If you have special circumstances, such as changes in residency or identity documents, that prevent authentication, please contact online customer service for advice.
- If camera permissions are not granted for the app, you will be unable to take photos of your identity document or perform facial recognition.


